![]()
The luckiest bikes are born with righteous drivetrains. They will snap smoothly from gear to gear, weigh next to nothing and last for a good long time. Most bikes are not so fortunate.
I’d thought the drivetrains featuring upon department store bikes were the worst available, until I saw what was on offer in Mauritania. China does send the U.S. some truly lousy bikes, but it is to countries in Africa that they send their refuse. The dearth of options is striking.
The simple riveted pivot points found on cheap derailleurs’ parallelograms allow their cages to sashay about of their own volition more freely—as you’re trying to shift, or charge up the busy hill, and this oversight can drop you out of gear, usually all of a sudden.
This may be an issue with your own bike, depending. Grab the bottom of the rear derailleur’s cage and see how much it can be swayed side to side. It’s much easier to shove the cheaper ones around; older and cheaper ones, all the more so.
Bad drivetrain parts weigh too much, bend too easily, and break far too quickly. The cheapest specialty shop parts will often do little better, unfortunately. We find some relief among older components of quality, which are often considered devalued well before they actually wear out, but this is nothing close to universal. Old doesn’t mean better, it means maybe.
It is difficult to describe the root of “most” shifting problems, simply because the discussion can branch in multiple directions. A given symptom may stem from a couple distinct issues, perhaps even simultaneously. The quality of your parts, the state of their health, your skill in using them, and even the weather itself can inform the situation. The more specifically you can describe a given problem, the sooner you’ll be able to isolate its particular solution. Do things go haywire when you’re upshifting, or downshifting? In some gears, or all of them? Do the gears only shift only hesitantly, or do they come and go more randomly? Are things always failing, or is it only when you pedal hard?
All these things happen for a reason. A basic understanding of how drivetrains work will allow you to diagnose and correct the great majority of the problems that may arise.
A. Friction
The FRICTION DERAILLEURS have not been current for decades, but plenty of them were made well enough, and many are still on the road. They were designed to work with the eponymous shift levers, which at their best will hold a given position with nothing more than simple friction. You may remember this from when you were a kid: changing the gears just by their feel?
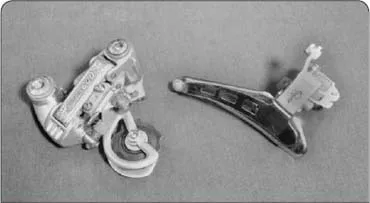
Front and rear friction derailleurs.
If nicer old parts interest you at all, it’s worth recalling the friction shifting. The different component manufacturers’ indexed rear derailleur systems, as we’ll see, are not often cross-compatible, so the friction levers are the only things saving some of the nicest old parts from ornamental obscurity.
There must have been an enormous freedom, back then—the derailleurs did not really have to care about any rigid instructions shouted down from on high—there was just this flow. It was rad. The more modern indexed shifting systems are pretty well obsessed with the shift cable’s tension, but the friction units are still only passively aware of this detail. They just don’t care that much. They try to work with what they have. It is mellow and good.
Friction levers require a small degree of finesse, on the part of the operator; something on par with cooking breakfast, perhaps. As with any other derailleur gear reduction system, is best to ease up on the pedals before shifting—to avoid shifting under load, to get in the right gear before you start climbing the hill—yet the friction levers will require an additional level of discretion. You are charged with selecting the gears all by yourself, without the benefit of any helpful confirmation offered up from the shift levers.
The only adjustments to concern us with friction derailleurs are a few basic ground rules, which are also held in common with their indexed peers. All the pivot points should be oiled just enough, but not excessively, with lightweight penetrating oil. Those few bolts involved should all be tight, and the shift lever and cable should also be in good working condition. You may also attend to the drivetrain cleaning, as described on page 136. The limit screws, to be discussed shortly, need to be correctly adjusted as well.
The rear derailleur gets knocked around more than other components might, given its position. The force from such blows is not infrequently transferred right up to the frame’s derailleur hanger. Bent derailleur hangers cause pronounced problems with the shifting—the chain will suddenly start dumping into the spokes, for example. This is actually a reasonably common problem. Moreover, none of the drivetrain remedies described herein will be effective until it is corrected.
Bent hangers are easy to spot. Looking from the rear of the bike, the derailleur cage should be parallel with the back wheel, the dropouts and the chainrings as well. An inward-leaning rear derailleur would suggest that the frame’s hanger is bent. See the treatment on frame damage, beginning on page 19.
The derailleurs’ cages may also be bent, though this is less common. The two pulleys are meant to be in line: anything less would indicate a bent cage. These can generally be straightened, if you take your time with it. You would need a vise. The pulleys are removed; each side is leveled individually. Modern front derailleurs often share odd lateral contours, between their two cage plates, but all those I’ve seen on rear derailleurs are meant to be parallel with each other.
The rear derailleur’s energy begins from a sturdy spring, which plays a constant tug-of-war with the stern yet whimsical shift lever. These springs wear out eventually; shifts into the highest gear would grow more sluggish, irrespective of all the appropriate maintenance. We sometimes see replacement springs, meant for some mid-90s Shimano derailleurs, but these are only mediators, meant to resolve an old dispute between rival component manufacturers. But this last we’ll consider in due course, on page 129.
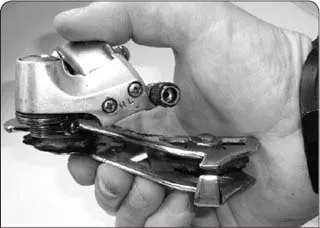
Rear derailleur limit screws: default location.
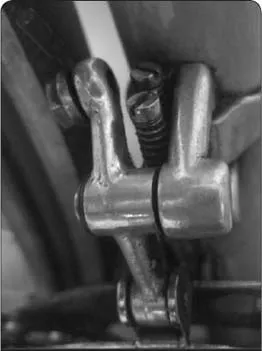
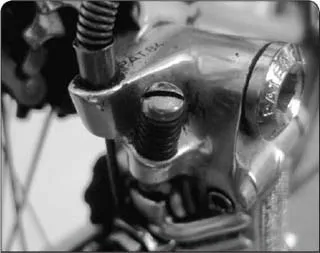
The derailleur itself is all of an articulated parallelogram, suspended between two pivot points. We need some method for preventing the bike’s chain from diving into the spokes, or jumping off the edge of the cogs, and this comes with the LIMIT SCREWS. You should spy a pair of these threaded in somewhere, pointed into the parallelogram. Each bottoms out on a different edge inside, allowing the limit screws to govern the derailleur’s range of motion.
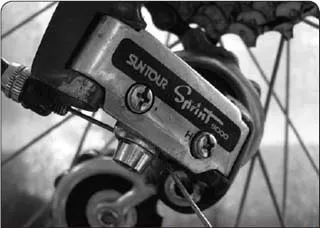
Rear derailleur limit screws in a more traditional setting.
The screws are usually labeled L and H, for low and high. Older friction rear derailleurs often set the limit screws in line across the parallelogram’s face, but at some point it became more fashionable to drill them instead into the derailleur’s top section. Their function would be the same in either location.
There is one potential complication, with regards to the limit screws’ positioning. For reasons beyond my awareness, the low and high screws have been traditionally set in a reversed sequence, such that the L screw features toward the high end of the derailleur’s range. I can’t imagine any clear purpose for this; it didn’t need to happen. SRAM has since come along to sort out this detail, reversing positions for the two screws. The basic map is always the same, but its orientation will sometimes change.
Limit screws—front derailleur.
We can check on the limit screws’ adjustments by suspending the rear wheel and turning the pedals. Push the derailleur all the way in toward the spokes, to confirm that it can stop in time. Looking from behind the bike, the L screw’s adjustment should prevent the chain from moving beyond the largest cog. Turn it in, if this is not the case. Conversely, if the chain is not able to reach that same largest gear, you would need to loosen the L screw. Work incrementally in either case, checking your work as you go.
The same principles are used when adjusting the H screw, which governs the chain’s access to the smallest gear. We turn the limit screws in, to limit the range of motion. They are turned out only if the derailleur will not reach the cogs in question.
Travis introduced me to a novel way to test the limit screws, up at the old Hayes St. Freewheel. You turn the cranks, and you yank on the cables. It sounds rough, but it really works. Unless you’re working on a carbon fiber bike, in which case you would want to be more delicate.
We grab the cable(s) as they pass along the down or top tube, in the more usual circumstances, and pull. This will tell us everything we need to know about the Low limit screws’ adjustments. Does the derailleur secretly want to get up there and throw the chain at the spokes? Now’s the time to find out! This cable-yanking business also has the effect of seating the cables and housing more thoroughly in their stops, which is useful for retaining our derailleur adjustments.
Note as well that you want to loosen the rear derailleur cable, before adjusting the H screw. (Or the L screw, with either the front derailleurs or the Low Normal rear units, to be described momentarily.) Their relationship is something like a seesaw; adjustments to the one become contingent upon the other. The limit screw sets the starting point for the derailleur cable to work from, so turning it will necessarily modify the cable’s tension. The cable just goes tense and stays that way, past a certain point, nullifying anything else that the limit screw may have to say.
If the markings are not clear, or if you get the L and H screws confused, it is easy enough to determine which is which. Release the shift cable from its derailleur. Loosening one of the screws will allow the spring inside the parallelogram to further contract, moving the derailleur cage down the gear range. This marks its “high” screw out back, or the “low” up front. This marks its “high” screw. (Here, too, there are exceptions: we sometimes come across derailleurs too rusted or grimy to really give a shit either way, and more recently we also have Shimano’s Rapid Rise/Low Normal derailleurs, which rearrange things such that the derailleur expands as its spring contracts.)
The derailleur would fold down to show you its resting position, once the two were removed, if it wasn’t there already. You would be able to push the parallelogram all the way up to the other end of the range, alternately, to better understand the role of the opposing limit screw. (The Rapid Rise/Low Normal rear derailleurs reverse this traditional equation: the spring would be relaxed in the Low position, or tensioned in the High position.) You would be able to push the parallelogram all the way up to the low end of the range, alternately, to better understand the role of the Low limit screw. (The Rapid Rise/Low Normal rear derailleurs reverse each of these equations—the spring would be relaxed in the Low position, or tensioned in the High position.)
The limit screws are meant to be adjusted just once, when the derailleur is first set up. You put them where they’re supposed to be, and you go ride the bike. Their threads are tiny, and often treated with thread-locking compound; they’re not inclined to rattle loose.
I find myself adjusting the limit screws very occasionally, doing tune-ups. I always confirm the derailleur hanger’s alignment, before doing anything else with the drivetrain. Bent derailleur hangers seem to be more common than maladjusted limit screws; either can just as easily toss your chain into the spokes.
Old-fashioned limit screw.
Each of the limit screws is dialed in to the point where the derailleur’s pulleys can just barely, very slightly move past the final cogs. The textbook methodology has us stopping the pulleys directly above the high and low cogs, but I like to let them out just a hair past that. This seems to help. Stand directly behind the bike and imagine lines radiating out in plane with the cogs’ teeth—we are comparing against those extending from the derailleur pulleys.
We need to get the rear derailleur dialed in first, in order to set up the front derailleur. This done, the first thing to do is make sure the front derailleur itself is properly installed.
The lowest point on its cage always needs to clear the top chainring by 2 mm. Pull it forward with the fingers, to check. At the same time, the longest section on the derailleur cage’s outer plate needs to rest parallel with the chainrings. This may be toward the front or the back of the cage, dependent on the derailleur’s manufacturer and vintage; the outer plates on really old examples are often perfectly flat. (Campagnolo again does the math a bit differently here, as we’ll see, declaring that their front derailleurs’ inner cage plates should be made parallel with the chainrings.)
Once the front derailleur is positioned correctly, shift the rear derailleur all the way up into its largest cog. While in this position, the inside plate of the front derailleur cage needs to barely clear the chain as well. I wish I could spell this out better for you, but this tiny distance has actually been shrinking with time. The more advanced front shifting systems do best with all of a millimeter’s breathing room; older examples may require twice that. The only way to know for sure is to test it. The chain should drop down to the smallest ring without hesitation to, as instructed, but it should not be able to fall down onto the bottom bracket shell.
We dial the front derailleur’s low screw to set the inner plate’s resting position, and finish with the “H” screw, to set the outer limit up on the high end.
Shift all the way down to the smallest chainring up front, to start. Park the rear derailleur in its highest gear, then spin the cranks and pull on the cable, just as we did out back. If the chain hops off the big ring, you need to tighten down the high limit screw.
Any front derailleur further anticipates a good chainline, as well as a well-oiled cable set to a useful tension.
B. Indexing
The INDEXED DERAILLEURS are more recent. They are designed to work with matching shift levers, which provide for ratchet-like clicks in correspondence with the gears below.
Their approach has been ubiquitous for some time. The first popular example to really succeed was the old chromed Shimano Indexing System (SIS) derailleur. In...