The Complete Beginner's Guide to Drawing
eBook - ePub

The Complete Beginner's Guide to Drawing

More than 200 drawing techniques, tips & lessons

Compartir libro
  1. 240 páginas
  2. English
  3. ePUB (apto para móviles)
  4. Disponible en iOS y Android
eBook - ePub

The Complete Beginner's Guide to Drawing

More than 200 drawing techniques, tips & lessons

Detalles del libro
Vista previa del libro
Índice
Citas

Información del libro

The Complete Beginner's Guide to Drawing contains more than 200 drawing techniques, tips, and lessons for budding artists looking to practice drawing a variety of subjects. This comprehensive, 240-page hardcover drawing guide covers a vast array of subjects, from landscapes, still lifes, and flowers to animals, portraits, and the human figure. Begin with a thorough introduction to the essential tools and materials you need to get started, including different types of pencils, sketchbooks, papers, and other tools. Then learn the fundamentals of drawing, as well as a variety of drawing techniques, including rendering realistic textures, creating volume, and capturing perspective. A series of easy-to-follow, step-by-step projects cover a variety of techniques, including:

  • Developing form
  • Rendering texture
  • Depth and distance
  • Foreshortening
  • Values and shading
  • Perspective
  • Balance and composition
  • Capturing realism and likeness
  • Depicting figures in action

With helpful tips and straightforward step-by-step lessons, The Complete Beginner's Guide to Drawing is the perfect resource for beginning artists who want to improvetheir drawing skills. The Complete Book of... series provides a comprehensive guide to drawing a vast array of subjects, from landscapes and flowers to animals and poses. Artists will learn the fundamentals of drawing, as well as a variety of techniques, including rendering realistic textures, capturing perspective, and creating dynamic portraits and compositions. With helpful tips and step-by-step artwork to inspire, the Complete Book of... series is the perfect resource for practiced beginning to intermediate artists looking to hone their drawing skills and techniques.

Preguntas frecuentes

¿Cómo cancelo mi suscripción?
Simplemente, dirígete a la sección ajustes de la cuenta y haz clic en «Cancelar suscripción». Así de sencillo. Después de cancelar tu suscripción, esta permanecerá activa el tiempo restante que hayas pagado. Obtén más información aquí.
¿Cómo descargo los libros?
Por el momento, todos nuestros libros ePub adaptables a dispositivos móviles se pueden descargar a través de la aplicación. La mayor parte de nuestros PDF también se puede descargar y ya estamos trabajando para que el resto también sea descargable. Obtén más información aquí.
¿En qué se diferencian los planes de precios?
Ambos planes te permiten acceder por completo a la biblioteca y a todas las funciones de Perlego. Las únicas diferencias son el precio y el período de suscripción: con el plan anual ahorrarás en torno a un 30 % en comparación con 12 meses de un plan mensual.
¿Qué es Perlego?
Somos un servicio de suscripción de libros de texto en línea que te permite acceder a toda una biblioteca en línea por menos de lo que cuesta un libro al mes. Con más de un millón de libros sobre más de 1000 categorías, ¡tenemos todo lo que necesitas! Obtén más información aquí.
¿Perlego ofrece la función de texto a voz?
Busca el símbolo de lectura en voz alta en tu próximo libro para ver si puedes escucharlo. La herramienta de lectura en voz alta lee el texto en voz alta por ti, resaltando el texto a medida que se lee. Puedes pausarla, acelerarla y ralentizarla. Obtén más información aquí.
¿Es The Complete Beginner's Guide to Drawing un PDF/ePUB en línea?
Sí, puedes acceder a The Complete Beginner's Guide to Drawing de en formato PDF o ePUB, así como a otros libros populares de Art y Art Techniques. Tenemos más de un millón de libros disponibles en nuestro catálogo para que explores.

Información

Año
2015
ISBN
9781633229044
Categoría
Art
Categoría
Art Techniques

MORE TIPS

Image
Image

PICTORIAL COMPOSITION

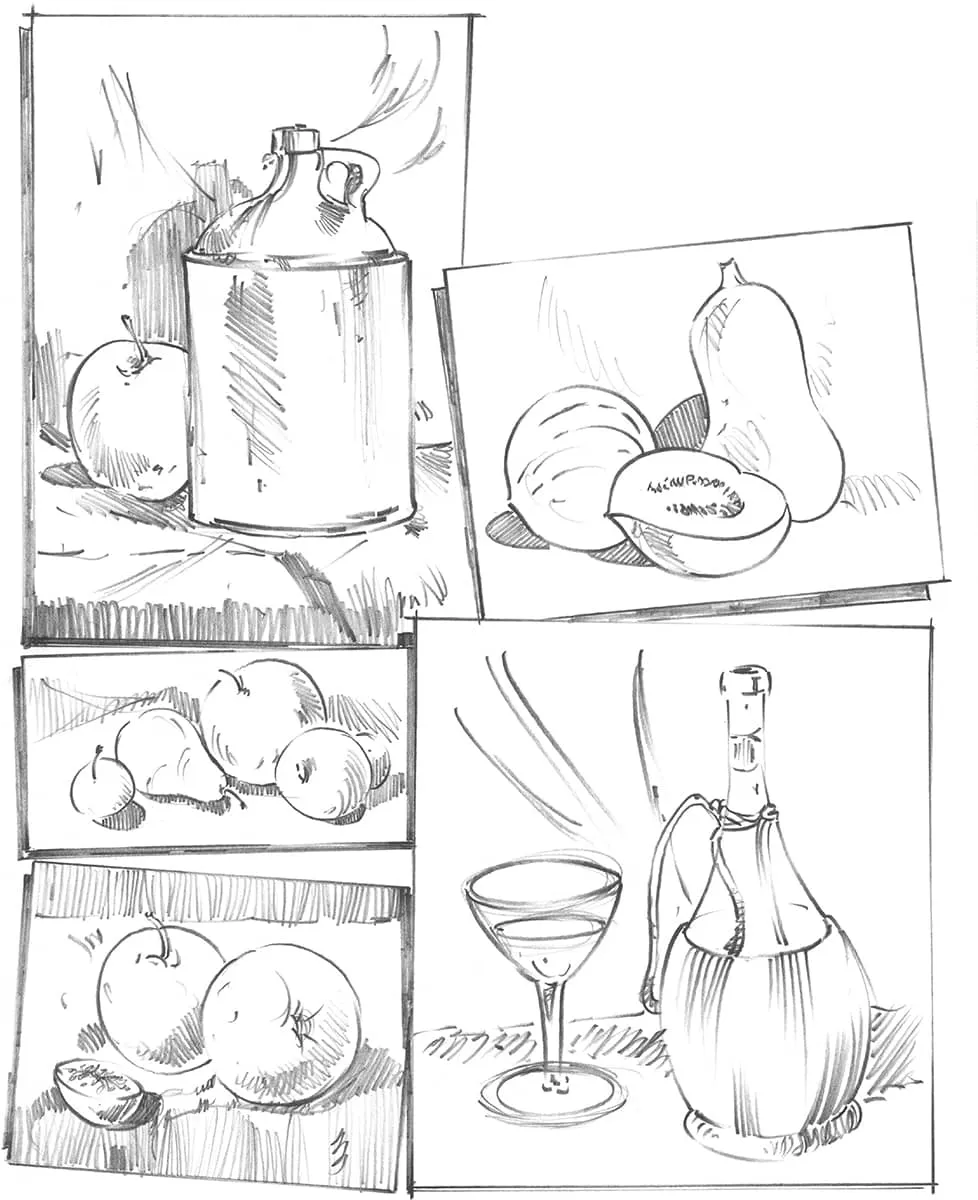
The dictionary defines composition as “the act of combining parts or elements to form a whole.” Good composition is important in any drawing, and the art of still life is an excellent way to practice arranging objects in your picture. Try to achieve a pleasing balance by moving objects around until they look “comfortable” in the scene.
Study the examples below. They have the right balance of background elements, shadows, and white space, strategically placed around the drawing, to make the picture appealing and interesting.
Image
When drawing, be sure to arrange the elements in a way that creates a pleasing design or composition. The overall design is determined by the placement of different shapes and lines. The composition should direct the viewer’s attention to the most important area of the drawing.
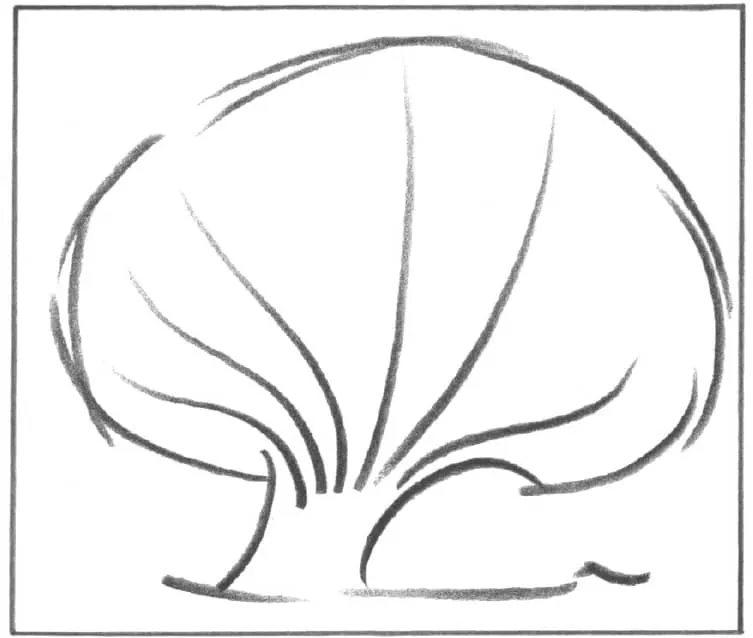
In the example below, the fanlike shape of the treetop draws the eye to the trunk area.
Image
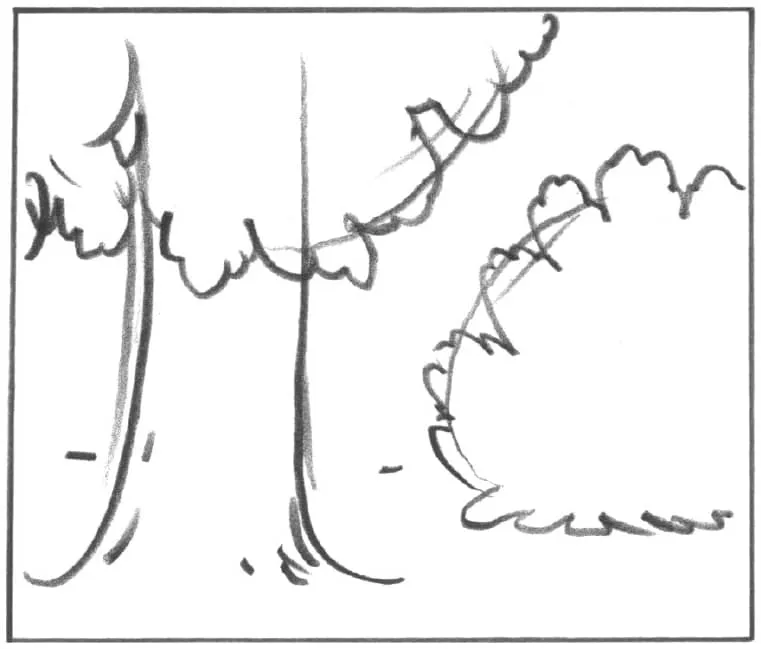
Below, the tree to the left is in the foreground, the area that appears closest in distance. The vertical direction of the trunk is subdued by the rounded foliage mass in the upper left corner. Balance is achieved by placing the shrub in the background and to the right. The background is the area of the scene that is farthest away.
Image
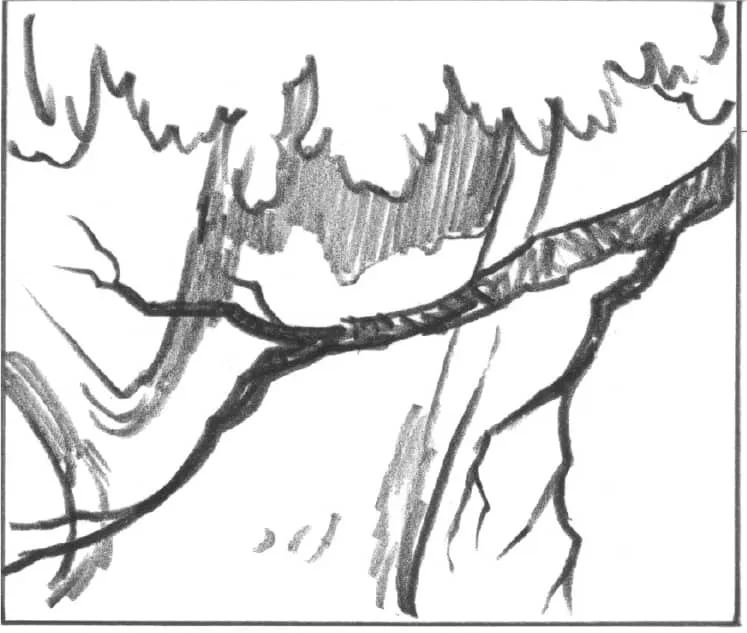
As shown below, a close-up of a tree can look very dramatic. Balance is achieved with opposing lines, which also lead the eye through the picture.
Image
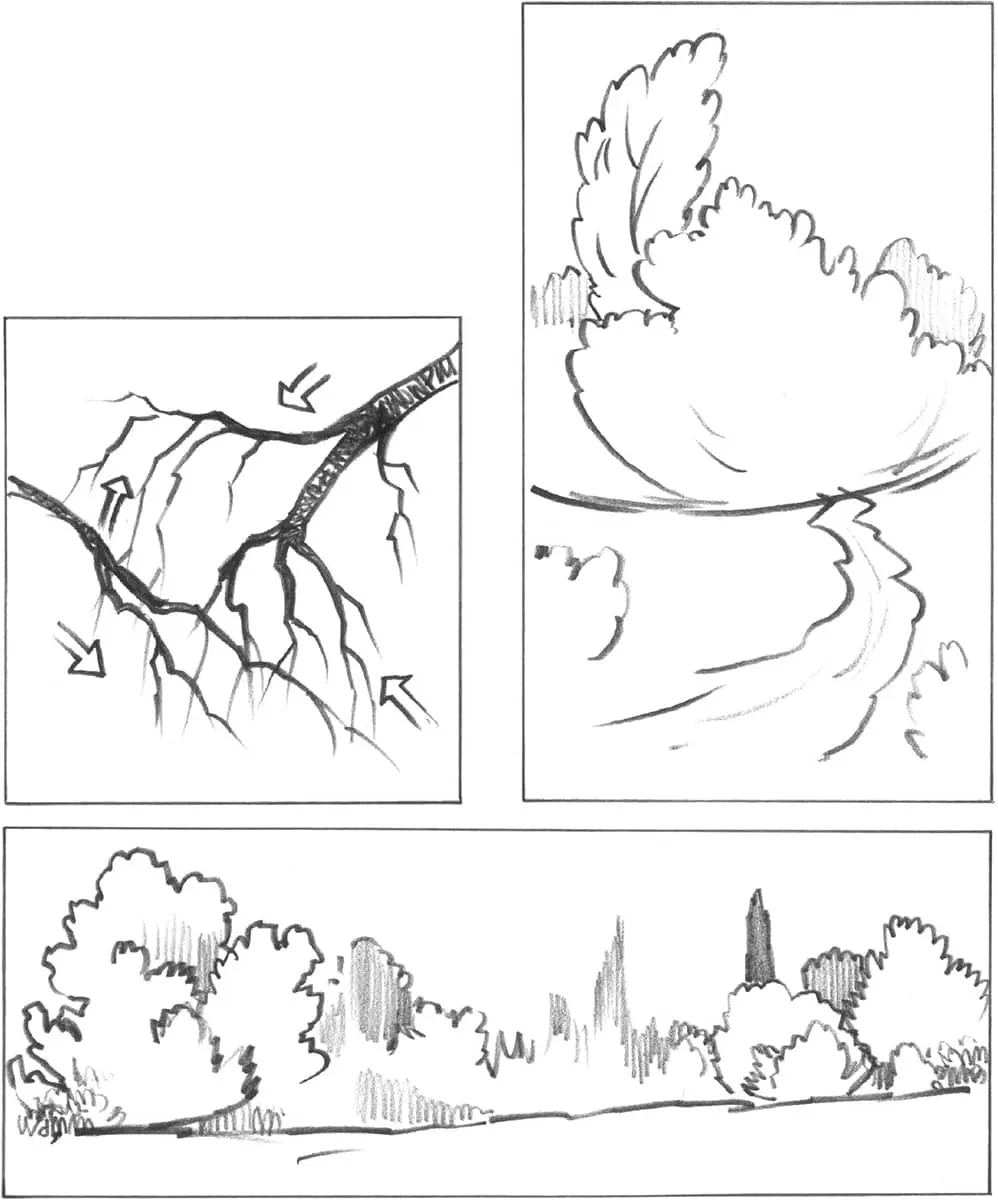
In the square composition below, the opposing lines of the branches create a focal point for the tree. (Try not to place the point of interest in the direct center.) The portrait (vertical) example to the right shows flowing lines, producing rhythm and balance.
Image
The landscape (horizontal) composition above represents a panoramic view. The large trees on the left are balanced by a group of smaller trees on the right. By placing the major elements on the right and left sides of the drawing, the center appears serene.
Image
The tall tree in the foreground is complemented by the clouds, mountains, and smaller trees in the distance.

PERSPECTIVE

Drawing is actually quite simple. Just sketch the shapes and masses you see. Sketch loosely and freely—if you discover something wrong with the shapes, you can refer to the rules of perspective below to make corrections. Your drawings don’t need to be tight and precise as far as geometric perspective goes, but they should be within the boundaries of these rules for a realistic portrayal of the subject.
Practice is the only way to improve your drawing skills and to polish your hand-eye relationships. It’s a good idea to sketch everything you see and keep all your drawings in a sketchbook so you can track the improvement. The following are a few exercises to introduce the basic elements of drawing in perspective. Begin with the one-point exercise.
ONE-POINT PERSPECTIVE
In one-point perspective, the face of a box is the closest part to the viewer, and it is parallel to the horizon line (eye level). The bottom, top, and sides of the face are parallel to the picture plane.
Horizon line
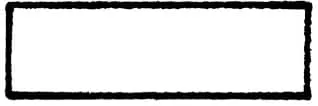
1. Draw a horizontal line, and label it “eye level” or “horizon line.” Draw a box below this line.
Image
Vp
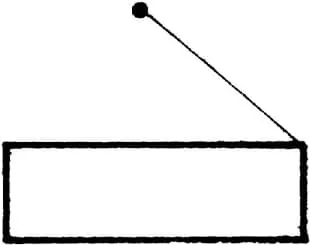
2. Now draw a light guideline from the top-right corner to a spot on the horizon line. Place a dot there, and label it VP (vanishing point). All side lines will go to the same VP.
Image
Vp
3. Next, draw a line from the other corner as shown, and then draw a horizontal line to establish the back of the box.
Image
Vp
4. Finally, darken all lines as shown, and you will have drawn a perfect box in one-point perspective. This box may become a book, a chest, a building, etc.
Image
TWO-POINT PERSPECTIVE
In two-point perspective, the corner of the box is closest to the viewer, and two VPs are needed. Nothing is parallel to the horizon line in this view. The vertical lines are parallel to the sides of the picture plane.
Image
1. Establish the horizon line (see “One-Point Perspective” at left), and then place a dot at each end and label them VP. Draw a vertical line that represents the corner of the box closest to the viewer.
Image
Image
2. Draw guidelines to each VP from the top and the bottom of the vertical line. Draw two more vertical lines for the back of the sides.
Image
3. Draw two lines to the VPs, as shown, to establish the top of the box. Now darken all the lines, and you will have drawn a perfect box in two-point perspective.

FINDING THE PROPER PEAK AND ANGLE OF A ROOF

Image
1. Draw a box in two-point perspective.
Image
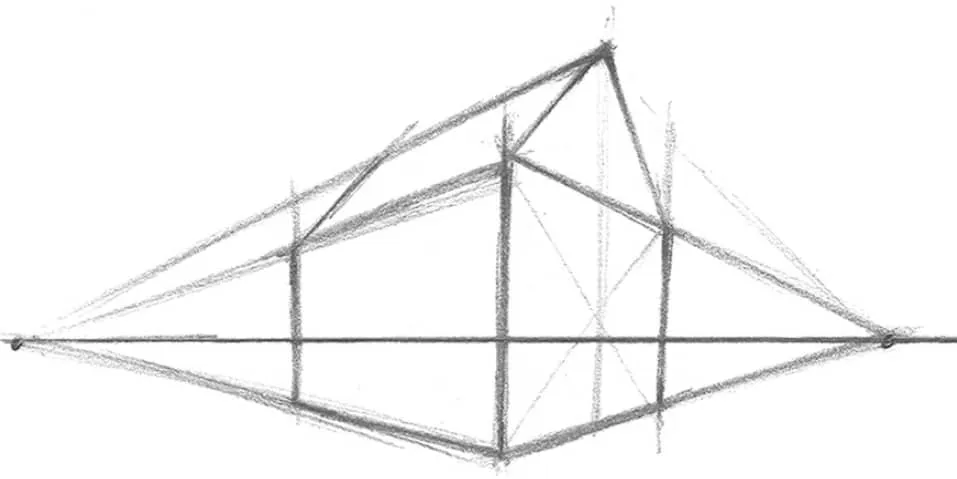
2. Find the center of the face by drawing diagonal lines from corner to corner; then draw a vertical line upward through the center. Make a dot for the roof height.
Image
3. Using the vanishing point, draw a line for the angle of the roof ridge; then draw the back of the roof. The angled roof lines will meet at a third VP somewhere in the sky.

BASIC FORMS

There are four basic forms you should know: the cube, the cone, the cylinder, and the sphere. Each of these forms can be an excellent guide for beginning a...

Índice