iOS 15 Application Development for Beginners
Learn Swift Programming and Build iPhone Apps with SwiftUI and Xcode 13
Arpit Kulsreshtha
- English
- ePUB (apto para móviles)
- Disponible en iOS y Android
iOS 15 Application Development for Beginners
Learn Swift Programming and Build iPhone Apps with SwiftUI and Xcode 13
Arpit Kulsreshtha
Información del libro
Learn iOS App development with advanced Apple technology and developer-centric tools.
Key Features
? Loaded with core developer tools, including SwiftUI, Xcode, and CoreML.
? Covers app architecture, design patterns, and mobile hardware use in app development.
? Numerous examples covering database, GPS, image recognition, and ML.
Description
This book is a step-by-step, hands-on guide for Apple developers to build iOS apps using Swift programming with minimal effort. This book will help develop the knowledge and skills necessary to program Apple applications independently. This book introduces you to Swift, SwiftUI, MapKit, Xcode, and Core ML and guides you through the process of creating a strong, marketable iOS application.The book begins with the fundamentals of Swift, which will serve as the foundation for future app development. This book will help readers to develop user interfaces for iOS applications, using SwiftUI and Interface Builder, as well as the code for views, view controllers, and data managers. The book teaches how to use Core Data and SQLite to store databases. It will help you work with Apple technologies and frameworks, including Core Location and MapKit for GPS tracking, Camera and Photo Library for image storage, Core ML for machine learning, and implementations of artificial intelligence solutions.By the end of this book, you will have developed a solid foundation for writing Swift apps, utilizing best practices in architecture, and publishing them to the app store. The book successfully introduces you to the entire iOS application development journey in a manageable manner and instills an understanding of Apple apps.
What you will learn
? Develop practical skills in Swift programming, Xcode, and SwiftUI.
? Learn to work around the database, file handling, and networking while building apps.
? Utilize the capabilities of mobile hardware to include sound, images, and videos.
? Bring machine learning capabilities using the Core ML framework.
? Integrate features such as App Gestures and Core Location into iOS applications.
? Utilize mobile design patterns and maintain a clean coding style.
Who this book is for
This book is ideal for beginners in programming, students, and professionals interested in learning how to program in iOS, use various developer tools, and create Apple apps. Working knowledge of any programming language is an advantage but not required.
Table of Contents
1. Getting Started with Xcode
2. Swift Fundamentals
3. Classes, Struct, and Enumerations
4. Protocols, Extensions, and Error Handling
5. TabBar, TableView, and CollectionView
6. User Interface Design with SwiftUI
7. Database with SQLite and Core Data
8. File Handling in iOS
9. App Gesture Recognizers in iOS
10. Core Location with MapKit
11. Camera And Photo Library
12. Machine Learning with Core ML
13. Networking in iOS Apps
14. Mobile App Patterns and Architectures
15. Publish iOS App on App Store
Preguntas frecuentes
Información
CHAPTER 1
Getting Started with Xcode
Introduction
Structure
- Xcode IDE
- Download and Install Xcode
- Xcode User Interface
- Configuring Xcode Project
- Run and Build Xcode iOS Project
- Code with Xcode Playground
- Xcode Organizer
Objectives
Xcode IDE
- An Apple system such as Mac mini, Macbook, iMac, etc, with MacOS 10.16Big Sur OS version.
- An Apple ID (if you don't have one, this chapter will help you to create an Apple ID).
- Apple iOS device (optional) (if you have one, you can run the apps on the device; otherwise Xcode Simulator will be enough to check how your apps work).
Download and install Xcode
- Open the Mac App Store.
- Search for the keyword Xcode and press the return key.
- In Search Results, Xcode version 13.0 will appear, click on Get and Install.
- Now, a box will appear which will ask for an Apple ID; if you already have an Apple ID, fill in the mentioned field and it will ask for a password for your Apple account. Refer to figure 1.1 as follows:
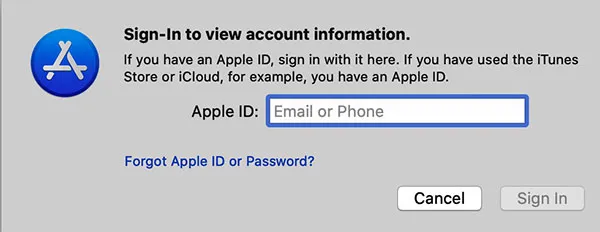 1.1: Account informationIf you don't have Apple ID, you must create a new Apple ID with the help of the following Apple support article:https://support.apple.com/en-in/HT204316
 - The latest version of Xcode is 13 which includes Swift 5.5, SDKs for iOS 15, iPadOS 15, tvOS 15, watchOS 8, and MacOS Big Sur.
- Open the Xcode from the App Store. This will install some supported SDK software for some time and will open the Xcode Welcome page, shown in figure 1.2 as follows:
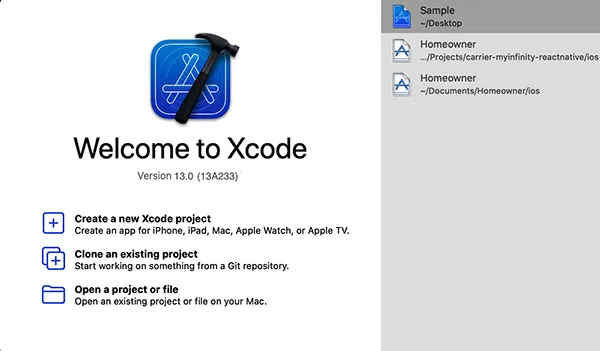 Figure 1.2: Xcode Welcome WindowNo recent projects will be seen if you are launching it for the first time. Click on Create a new Xcode project to set up a new project for iOS apps development.
 - Now, you will see a set of new options to choose from, shown in figure 1.3 as follows:
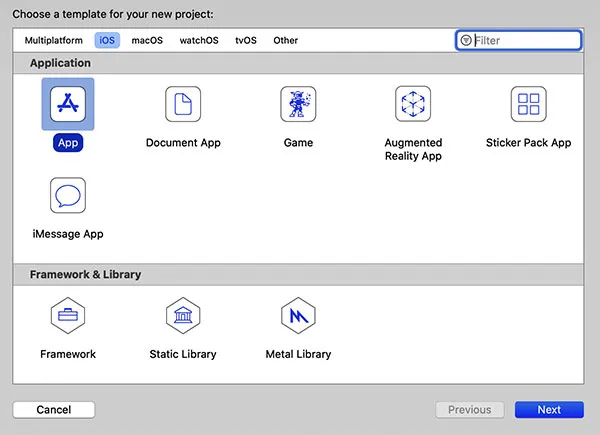 Figure 1.3: Select Application PlatformTo make an app for iPhone and iPad, select the option as iOS. Similarly, select watchOS, tvOS MacOS, and multi-platform for iWatch, Apple TV, Mac apps, and hybrid apps respectively. Then select
Appand click on Next. - The next screen will have some fields to fill up regarding the setting up of the project, such as product name, team, organization name, organization identifier, language, and user interface. Let's understand what possible values these fields could have and how it would impact the project, which is going to be created, as follows:
- Product Name: This will be the name of your App which will be entered in the text field of the project name.
- Team: Apple Developer account of Team for the project. We will discuss this in detail in Chapter 15: Publish Apps on the App Store.
- Organization Name: The name of your company that owns the development of this project. You can just put your name for now while you learn.
- Organization Identifier: This identifier is created with the conjunction of company name. For now, enter com.organizationname.
- Bundle Identifier: This field is not allowed for you to edit. It's automatically created by combining an organization name with an organization identifier. This identifier is used to identify the apps uniquely on the Apple App Store. Refer to figure 1.4 as follows:
 Figure 1.4: New iOS Project
 - Language: This specifies the programming language to be used in app development. Select Swift from the drop box field.
- User Interface: For now, set this to Storyboard. We will discuss another type of user interface selection, SwiftUI.
- Life Cycle: When you create a new SwiftUI Application in an Xcode, you'd be given an option to choose between SwiftUI App Lifecycle and UIKit App Delegate. If the user interface is selected as Storyboard, it would be UIKit App Delegate by default.
- Checkboxes: These checkboxes are used to include the core data for the purpose of local database, unit test, and the UI unit test cases in the project. Keep them unchecked for now.
- Choose the location where you want to save this project code in your Mac machine.
Xcode user interface
- ToolBar: This toolbar on the top left side of Xcode is used to build, run the app, and view the execution progress of your app.
- Windows pan bar: This will help you configure the Xcode development environment.
- Object Library: Addition or plus button will be used to add UI or object components to the project.
- Version Editor: This will be used to check for differences of codes between two versions.
- Open and close buttons for Navigator, Debug, and Editor Area in Complete windows pan.
- Navigator area: This provides quick access to all the parts of the project. The Navigation area is shown by default in the Xcode window.
- Editor area: The Editor area allows you to edit your code, user interface components, and resource files, if required in the project.
- Inspector area: This area will allow you to edit the information related to the items in the Navigator area and Editor area.
- Debug area: This area contains two portions – one for the view of variables and their values and another one for the console.
Xcode search navigator
