The Complete Beginner's Guide to Drawing
More than 200 drawing techniques, tips & lessons
- 240 pages
- English
- ePUB (mobile friendly)
- Available on iOS & Android
About this book
The Complete Beginner’s Guide to Drawing contains more than 200 drawing techniques, tips, and lessons for budding artists looking to practice drawing a variety of subjects.
This comprehensive, 240-page hardcover drawing guide covers a vast array of subjects, from landscapes, still lifes, and flowers to animals, portraits, and the human figure. Begin with a thorough introduction to the essential tools and materials you need to get started, including different types of pencils, sketchbooks, papers, and other tools. Then learn the fundamentals of drawing, as well as a variety of drawing techniques, including rendering realistic textures, creating volume, and capturing perspective. A series of easy-to-follow, step-by-step projects cover a variety of techniques, including:
- Developing form
- Rendering texture
- Depth and distance
- Foreshortening
- Values and shading
- Perspective
- Balance and composition
- Capturing realism and likeness
- Depicting figures in action
With helpful tips and straightforward step-by-step lessons, The Complete Beginner’s Guide to Drawing is the perfect resource for beginning artists who want to improve their drawing skills.
The Complete Book of ... series provides a comprehensive guide to drawing a vast array of subjects, from landscapes and flowers to animals and poses. Artists will learn the fundamentals of drawing, as well as a variety of techniques, including rendering realistic textures, capturing perspective, and creating dynamic portraits and compositions. With helpful tips and step-by-step artwork to inspire, the Complete Book of ... series is the perfect resource for practiced beginning to intermediate artists looking to hone their drawing skills and techniques.
Tools to learn more effectively

Saving Books

Keyword Search

Annotating Text

Listen to it instead
Information
MORE TIPS


PICTORIAL COMPOSITION

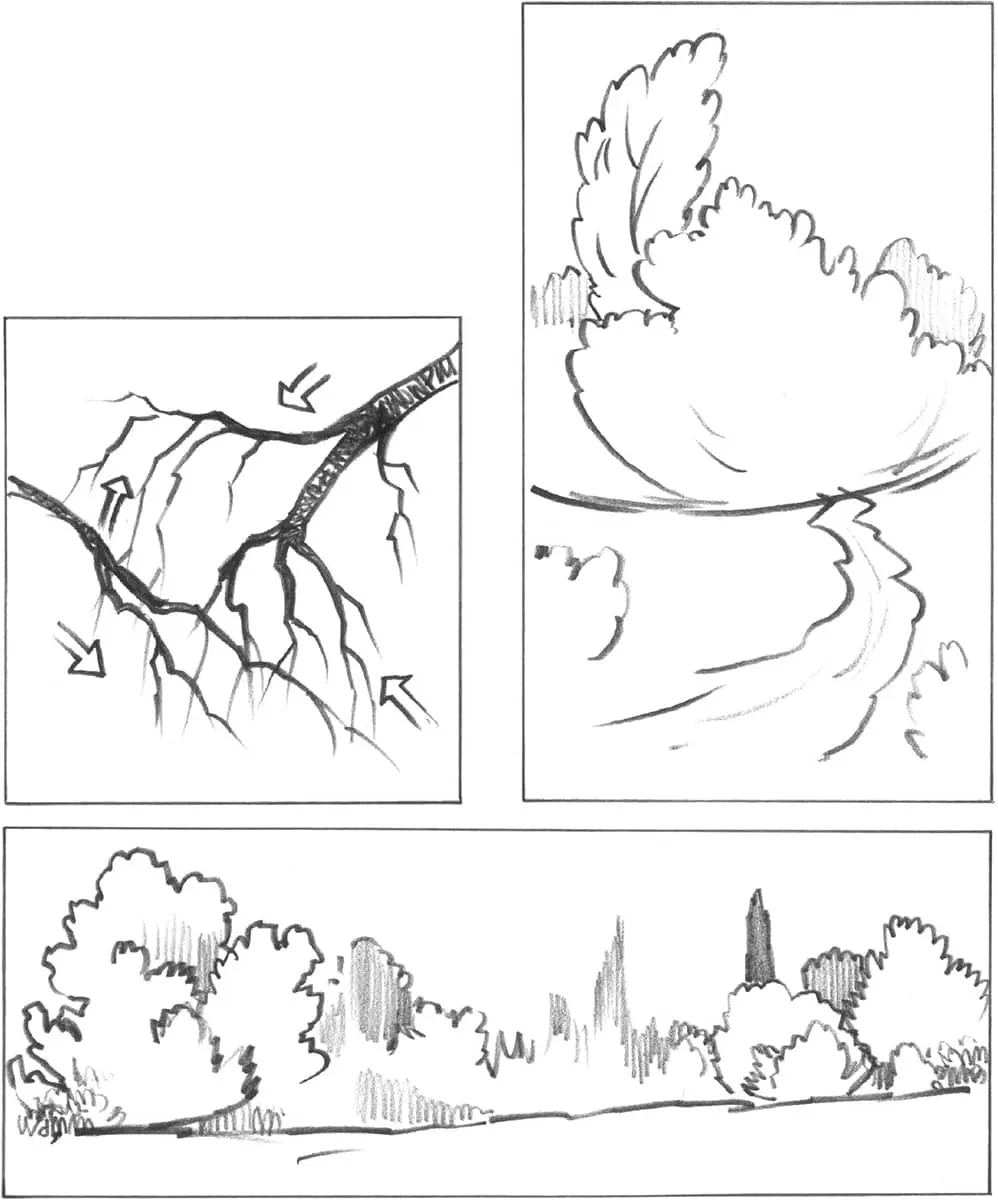

PERSPECTIVE
ONE-POINT PERSPECTIVE In one-point perspective, the face of a box is the closest part to the viewer, and it is parallel to the horizon line (eye level). The bottom, top, and sides of the face are parallel to the picture plane. | |
Horizon line | |
1. Draw a horizontal line, and label it “eye level” or “horizon line.” Draw a box below this line. |  |
Vp | |
2. Now draw a light guideline from the top-right corner to a spot on the horizon line. Place a dot there, and label it VP (vanishing point). All side lines will go to the same VP. |  |
Vp | |
3. Next, draw a line from the other corner as shown, and then draw a horizontal line to establish the back of the box. | 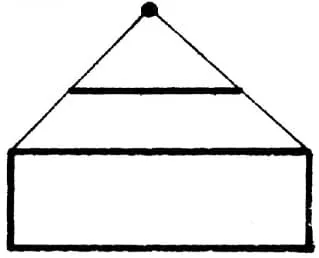 |
Vp | |
4. Finally, darken all lines as shown, and you will have drawn a perfect box in one-point perspective. This box may become a book, a chest, a building, etc. |  |
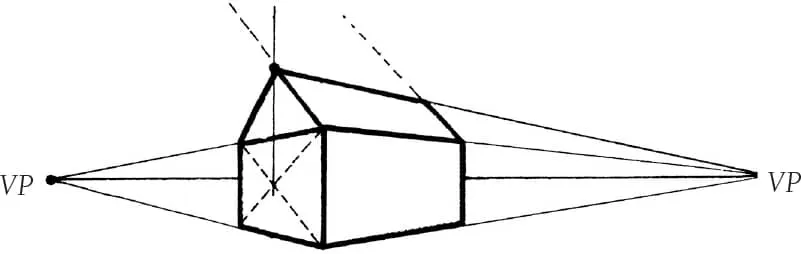
TWO-POINT PERSPECTIVE In two-point perspective, the corner of the box is closest to the viewer, and two VPs are needed. Nothing is parallel to the horizon line in this view. The vertical lines are parallel to the sides of the picture plane. | |
 | |
1. Establish the horizon line (see “One-Point Perspective” at left), and then place a dot at each end and label them VP. Draw a vertical line that represents the corner of the box closest to the viewer. |  |
 | |
2. Draw guidelines to each VP from the top and the bottom of the vertical line. Draw two more vertical lines for the back of the sides. | |
 | |
3. Draw two lines to the VPs, as shown, to establish the top of the box. Now darken all the lines, and you will have drawn a perfect box in two-point perspective. | |
FINDING THE PROPER PEAK AND ANGLE OF A ROOF


BASIC FORMS
Table of contents
- Cover
- Title Page
- Contents
- Basics
- Flowers
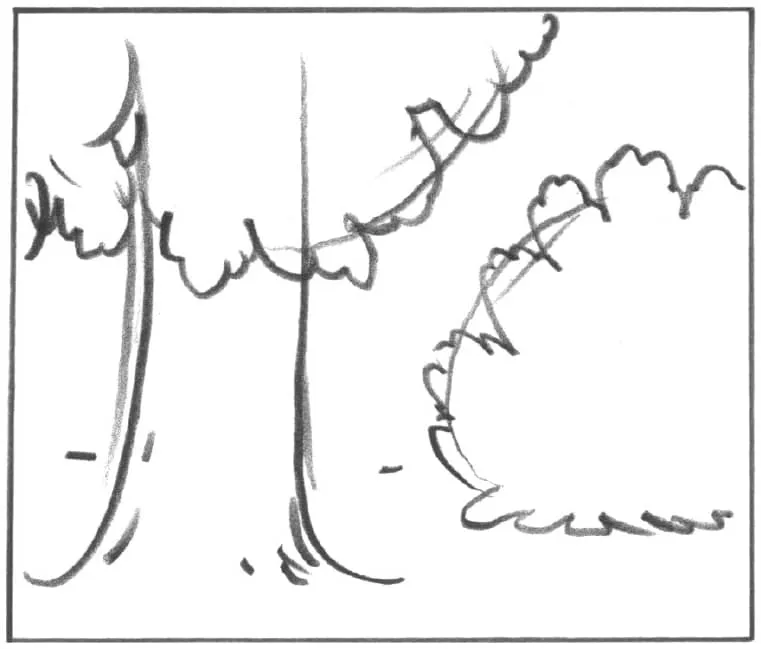
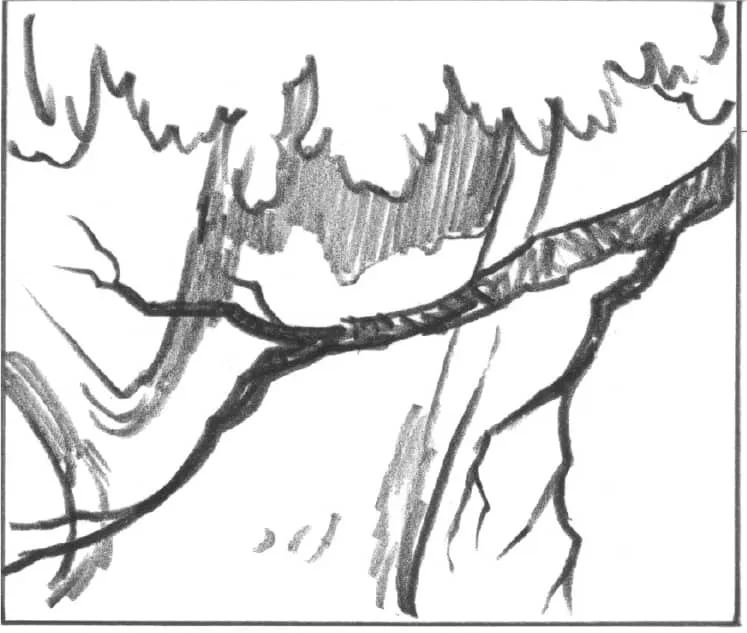
- Landscapes
- Animals
- Cats
- Dogs
- Horses
- People
- Body
- Children
- Anatomy
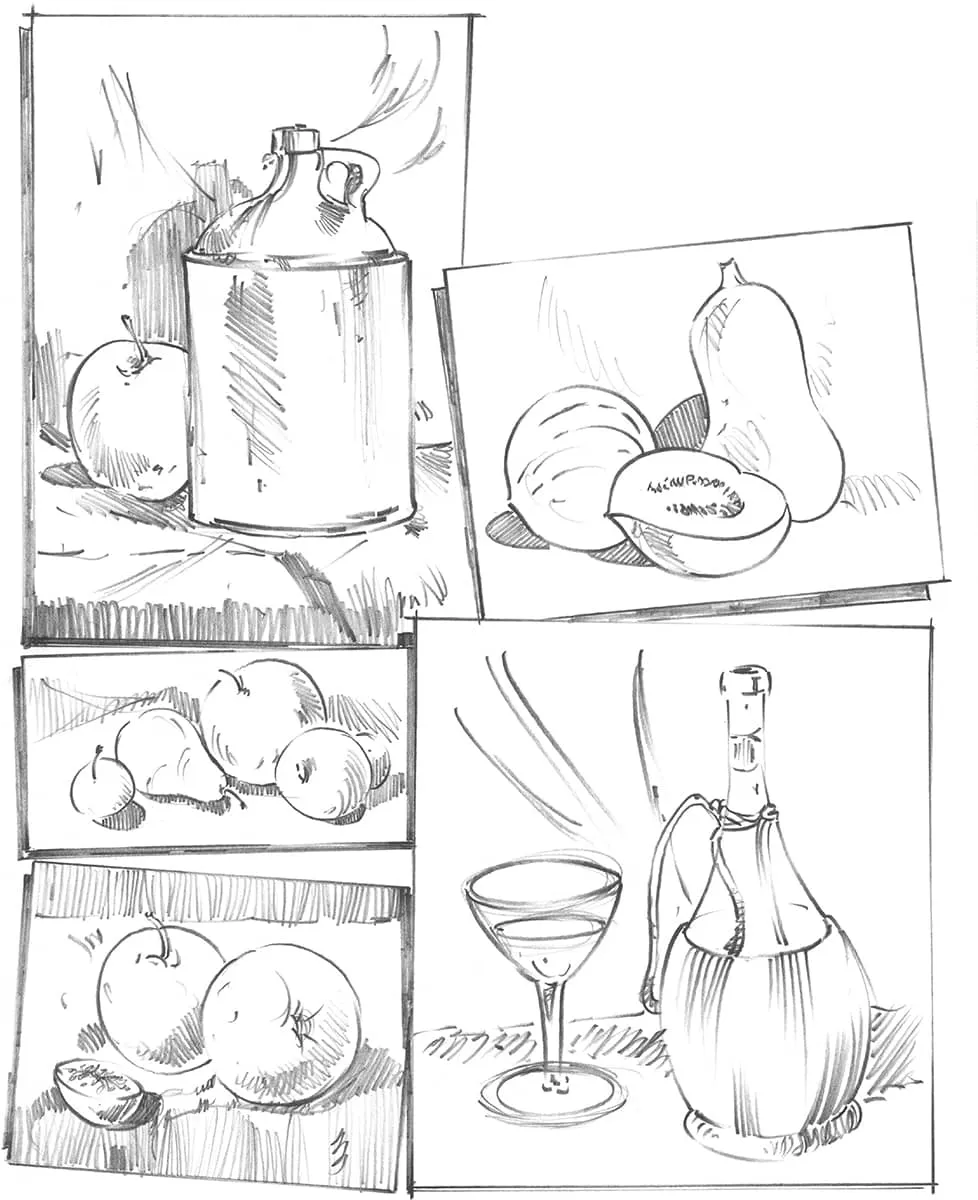
- Still Life
- More Tips
- Copyright Page
Frequently asked questions
- Essential is ideal for learners and professionals who enjoy exploring a wide range of subjects. Access the Essential Library with 800,000+ trusted titles and best-sellers across business, personal growth, and the humanities. Includes unlimited reading time and Standard Read Aloud voice.
- Complete: Perfect for advanced learners and researchers needing full, unrestricted access. Unlock 1.4M+ books across hundreds of subjects, including academic and specialized titles. The Complete Plan also includes advanced features like Premium Read Aloud and Research Assistant.
Please note we cannot support devices running on iOS 13 and Android 7 or earlier. Learn more about using the app