![]()
CHAPTER ONE
See the Light
![]()
TECH TALK
1/1250 sec at f/5.6
ISO 800
28–300mm
f/3.5 lens
EXPOSURE
A digital camera is just a box with a hole on one side and a light-sensitive sensor on the other. To take a picture, the sensor needs just the right amount of light. If it doesn’t get enough, details will vanish in darkness (underexposure). But if it gets too much, details will disappear in the highlights (overexposure). The correct exposure —determined by the size of the hole (aperture), the length of time it’s open (shutter speed), and the light-sensitivity level (ISO) — will give you the best balance of highlights and shadows, with plenty of detail. In this section, we’ll explore how your camera arrives at an exposure for a scene, and how you can set it up for success in program (P) mode. Later, in #067, I’ll walk you through setting manual exposures, which will give you even greater control.

014 LOOK AT A GRAPH OF YOUR EXPOSURE
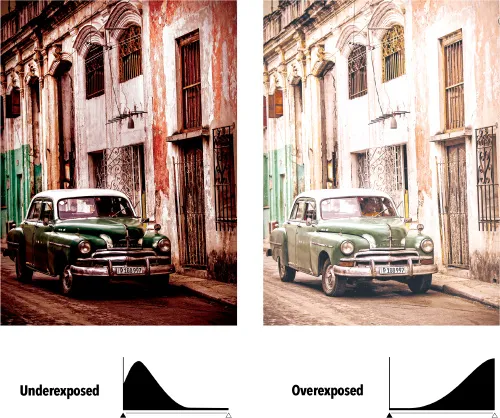
An excellent tool for evaluating your exposures is the histogram, a graph of the range of tones in the scene from darkest (left) to brightest (right). You can look at a photo’s histogram post-capture on the LCD screen, or keep the histogram live as you shoot. In general, you want to see an even distribution from right to left, with a gentle peak near the middle. If you see the graph bunched up against the left or right side, you’re getting clipping: shadow or highlight tones that are too extreme to be recorded by the sensor. And in many cases that’s fine: The histogram for this classic car in Cuba, for example, reveals some detail lost in the car’s shadow, as well as clipped highlights in the building’s facade — both of which are acceptable. The trick is knowing when clipping is okay given your scene or vision.

Well exposed

Underexposed

Overexposed
015 FILL THE LIGHT BUCKET
Exposure is the most crucial aspect of photography—in fact, taking a picture is often called “making an exposure.” So let’s slow this concept down and introduce a helpful if somewhat imaginative metaphor: filling a bucket with light. (Stay with me.)
Think back on a time when you filled a bucket with water. If you turned on the tap just a little, it took a good amount of time for the bucket to reach full capacity—say, 4 minutes. But when you started with the faucet opened twice as wide, your bucket filled up much faster, maybe in 2 minutes. And if you opened it up to its widest, that bucket may have been overflowing in only 1 minute. The fill level— exposure— is measured by a factor called stops. If you double the exposure, it’s called adding one stop. If you halve the exposure, you’re subtracting one stop.
It’s the same with your camera, only your camera’s digital sensor is the bucket; the width of the faucet’s opening is the lens’s aperture; and the length of time that the water runs is the shutter speed. To ensure that the sensor receives just the right amount of light to make an exposure, you adjust the size of the faucet opening (aperture) and the amount of time you’re letting the light through it (shutter speed).
Too little or too much of either shutter time or aperture width and you’ll get photographs that are too dark (when the bucket didn’t fill up all the way) or too light (when the bucket overflowed).
With some exceptions, the aperture and shutter are mechanical controls: When you push the shutter button to take a photo, a superaccurate timer tells the shutter curtain when to snap open and closed, while a variable circular opening called the diaphragm manages the width of the aperture. To see how these mechanics can be manipulated for creative effects, see #039–048 and #049–054, respectively.
f/4 APERTURE
1/1000 SHUTTER SPEED
f/8 APERTURE
1/250 SHUTTER SPEED
f/16 APERTURE
1/60 SHUTTER SPEED
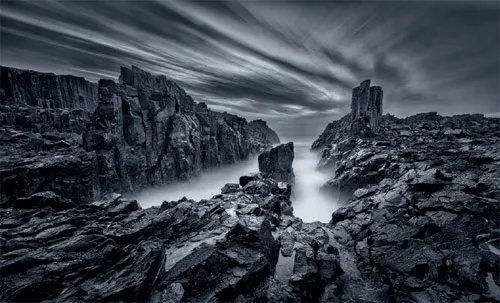
TECH TALK
68 sec at f/13
ISO 100
14 –24mm
f/2.8 lens
016 DISCOVER LIGHT METERING
How does your camera know just how to adjust your aperture and shutter speed to arrive at a quality exposure? By way of a light meter— an electronic device that measures the amount of light coming through the lens and creates an exposure setting for a middle tone. This calculation is based on the tone of an 18-percent-reflectance neutral-gray card—in fact, it is common procedure to place one of these cards in your scene and take a meter reading directly off it. (It also can help with white balance, which we discuss in #060).
Your light meter’s fondness for midtones creates even exposures, but it can cause problems. If you meter off a light-skinned person’s face, for example, that exposure will render the person’s face a middle tone. Meter off a dark-complected person’s face, and the reading will also render the face a middle tone. Experienced photographers learn to adjust their exposures, but this doesn’t lend itself to speedy automation.
The light meter in your camera, however, is smart. It can analyze scenes with complex lighting and make good guesses at the exposure. But it can still make a bad guess— or a good guess that you plain don’t like. That’s what exposure compensation (see #020) and manual exposure (#066–070) are for.
CONTROL CORNER
FIND YOUR METER MODE
Physical switch Very common on many cameras (almost always on the back, near your thumb), this switch lets you click quickly from mode to mode.
Physical button You press a button or a four-way controller, then twirl a command wheel to set your desired meter pattern.
Function menu/touchscreen menu Hit a button to go into an on-screen menu, then scroll with a command wheel or four-way controller (conventional menu) or finger-scroll (touchscreen) to access the meter choices.
017 KNOW YOUR CAMERA’S LIGHT METERING MODES
Your DSLR or ILC camera has three, and possibly four, metering modes that allow your camera to arrive at its best guess of an exposure. Each metering mode uses a different tactic to measure the light in your scene.
SPOTMETER This metering mode measures the light in only a small circle delineated in the viewfinder or LCD. Strictly a reading for achieving a middle tone, the spotmeter is the preferred tool of very careful shooters looking to make precise exposures. Typical targets for a middle tone include gray rocks, green grass, and clear north sky midmorning or midafternoon.
LIMITED AREA This mode isn’t found on all cameras; it behaves much like the spotmeter but takes in a wider area, and is hence also called fat spot. It’s good for a quick reading of an important area of the scene that you judge to be more or less around that middle zone.
CENTERWEIGHTED This mode makes a reading over the entire area of the frame with a bias toward the center, and it averages its reading for a middle-tone setting. Long popular with many shooters, it is generally reliable, but it can be fooled— notably by strong backlighting or spotlight...