
eBook - ePub
Automotive Technician Training: Practical Worksheets Level 3
Tom Denton
This is a test
- 184 pages
- English
- ePUB (adapté aux mobiles)
- Disponible sur iOS et Android
eBook - ePub
Automotive Technician Training: Practical Worksheets Level 3
Tom Denton
Détails du livre
Aperçu du livre
Table des matières
Citations
À propos de ce livre
Automotive practical worksheets and assessments for students at Level 3
This Level 3 Student Worksheets book contains tasks that help you develop practical skills and prepare you for assessment. The tasks also reinforce the automotive theory that you will learn online and in the classroom. Each worksheet covers individual topics in a step-by-step manner, detailing how to carry out all of the most important tasks contained within the syllabus. Alongside each of these worksheets is a job card that can be filled in and used as evidence towards your qualification.
- Endorsed by the Institute of the Motor Industry for all of their Level 3 automotive courses.
- Step-by-step guides to the practical tasks required at all Level 3 qualifications.
- Job sheets for students to complete and feedback sheets for assessors to complete.
Foire aux questions
Comment puis-je résilier mon abonnement ?
Il vous suffit de vous rendre dans la section compte dans paramètres et de cliquer sur « Résilier l’abonnement ». C’est aussi simple que cela ! Une fois que vous aurez résilié votre abonnement, il restera actif pour le reste de la période pour laquelle vous avez payé. Découvrez-en plus ici.
Puis-je / comment puis-je télécharger des livres ?
Pour le moment, tous nos livres en format ePub adaptés aux mobiles peuvent être téléchargés via l’application. La plupart de nos PDF sont également disponibles en téléchargement et les autres seront téléchargeables très prochainement. Découvrez-en plus ici.
Quelle est la différence entre les formules tarifaires ?
Les deux abonnements vous donnent un accès complet à la bibliothèque et à toutes les fonctionnalités de Perlego. Les seules différences sont les tarifs ainsi que la période d’abonnement : avec l’abonnement annuel, vous économiserez environ 30 % par rapport à 12 mois d’abonnement mensuel.
Qu’est-ce que Perlego ?
Nous sommes un service d’abonnement à des ouvrages universitaires en ligne, où vous pouvez accéder à toute une bibliothèque pour un prix inférieur à celui d’un seul livre par mois. Avec plus d’un million de livres sur plus de 1 000 sujets, nous avons ce qu’il vous faut ! Découvrez-en plus ici.
Prenez-vous en charge la synthèse vocale ?
Recherchez le symbole Écouter sur votre prochain livre pour voir si vous pouvez l’écouter. L’outil Écouter lit le texte à haute voix pour vous, en surlignant le passage qui est en cours de lecture. Vous pouvez le mettre sur pause, l’accélérer ou le ralentir. Découvrez-en plus ici.
Est-ce que Automotive Technician Training: Practical Worksheets Level 3 est un PDF/ePUB en ligne ?
Oui, vous pouvez accéder à Automotive Technician Training: Practical Worksheets Level 3 par Tom Denton en format PDF et/ou ePUB ainsi qu’à d’autres livres populaires dans Technology & Engineering et Civil Engineering. Nous disposons de plus d’un million d’ouvrages à découvrir dans notre catalogue.
Informations
Engines
Worksheet 1: Vehicle inspections
Procedure

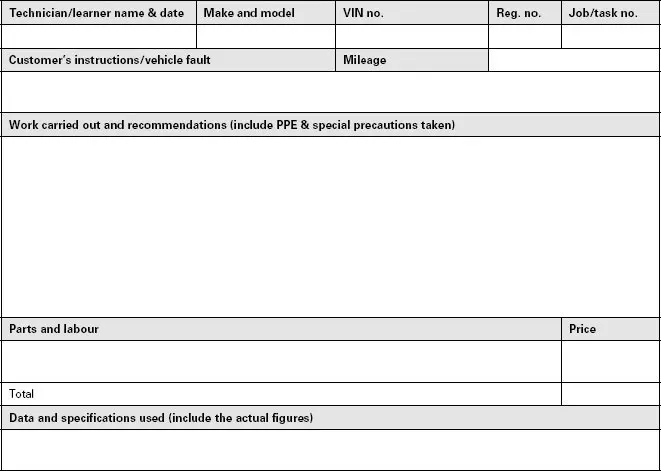
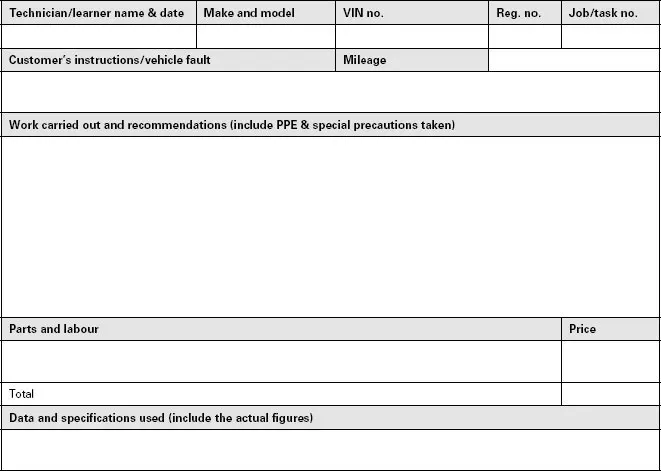
Job card
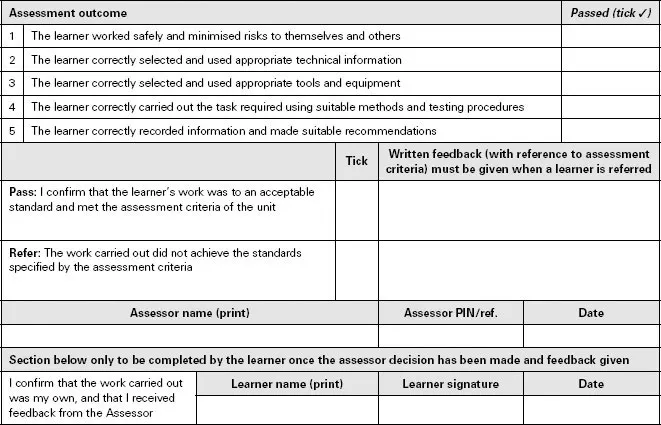
Assessor report

Worksheet 2: Carry out exhaust gas analysis using an exhaust gas analyser
Procedure
Job card
Assessor report
Worksheet 3: Remove and replace electronic distributor – strip and reassemble
Procedure