


Chapter 1
Getting Started with WordPress
In This Chapter
If you’re just starting out and don’t want to spend money purchasing a domain name and hosting your site with a third-party web host, WordPress has a great solution for you.
This book takes a complete look at the hosted service offered at WordPress, and in this chapter you discover how to create a free blog through this service. You also find out how to get your hosted blog up and running.
Don’t confuse WordPress.com with the blogging software available for download at WordPress.org! Both were created and developed by the same folks, and they do have the same name; however, they are different varieties of WordPress. (Check out my book, WordPress For Dummies, 4th Edition, for information on installing and using the self-hosted version of WordPress.org.)
Creating a WordPress Account
To create your WordPress user account, follow these steps:
1. In the address bar of your browser, enter the URL
http://wordpress.com. 2. On the page that appears, click the Get Started Here button shown in Figure 1-1.
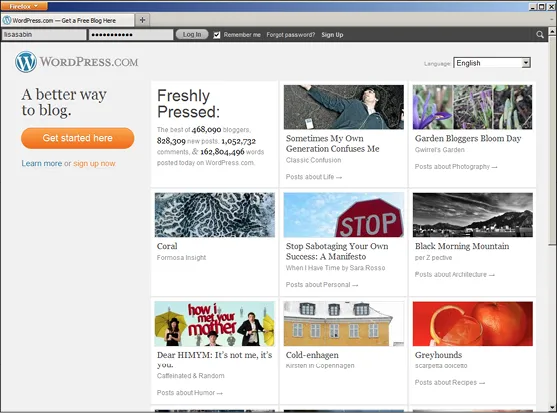
Figure 1-1: On the WordPress main page, click the Get Started Here button.
You’re taken to the WordPress signup page at
http://wordpress.com/signup. 3. In the Blog Address text box, type the word you’ve chosen as your blog address.
Whatever you enter here becomes the URL address of your blog. It must be at least four characters (letters and numbers only), and don’t worry about choosing the perfect address; you can change this later. You can use any blog address you want; however, if you choose a blog address that already exists, WordPress displays a message, as shown in Figure 1-2, that you need to pick a new one because duplicate blog addresses are not allowed.

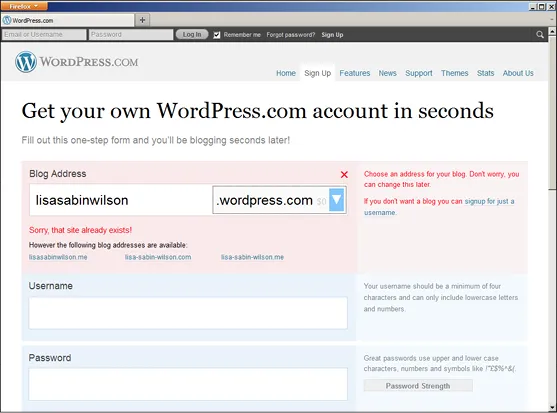
Figure 1-2: WordPress does not allow duplicate blog addresses.
4. Select the suffix for your blog address.
In the drop-down list to the right of the Blog Address text box, you have several options. One is free, and the others cost you $17 to $20/year. In Figure 1-3, I typed in
lswblogg as my blog address and have chosen the WordPress suffix, which creates the full blog address of http://lswblogg.wordpress.com. However, WordPress gives me the option to purchase the available domain name lswblogg.com if I want to spend an additional $17. WordPress also makes the .net and .org suffixes available for purchase. For now, select the free wordpress.com suffix; you can always upgrade to a paid domain at a later time if you want.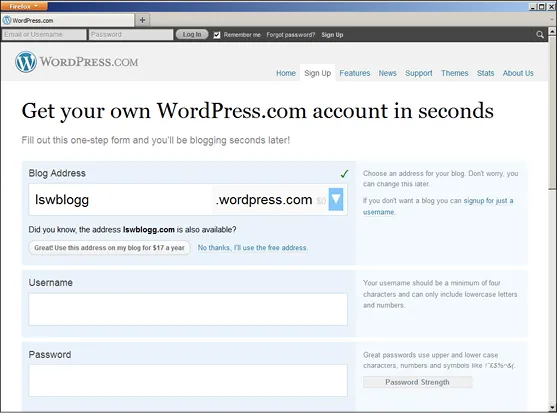
Figure 1-3: Select the free WordPress suffix for your blog address.
5. In the Username text box, enter the name you want to use to log in to your blog from now until forever.
Your username must be at least four characters in length with letters and numbers only. WordPress will automatically fill in the username box with a username that is the same as the blog address you entered in Step 4; however, you don’t have to use that one and can choose to type in your own, unique username. For security purposes, it is a good idea to have a username that’s different from your blog address because that makes it more difficult for anyone to guess what your username is. Your username cannot be changed for the blog you are creating right now. In the future, you can sign up for a new WordPress account with a new username; you can also start over with a new blog.
6. Enter a password of your choice, first in the Password text box and then again in the Confirm box.
You use this password to log in to your new WordPress account. Choose and then type a password that you will remember, but not one that would be easy for any outside users to guess. Your password must be at least four characters in length. WordPress gives you a visual indicator of the strength of your password choice, with “strength” meaning how easy or difficult it is for someone to guess what your password is.
7. Enter your e-mail address in the E-mail Address text box.
This address isn’t made public on your blog; rather, it’s used for communication between you and WordPress. You can change this address later in the General Settings section in your WordPress Dashboard. Be sure to use your primary e-mail address here because WordPress sends your login information to it; additionally, should you forget your password, you can ask WordPress to resend it, and it goes to the e-mail address you include in this step.
8. (Optional) Select the check box next to Follow Our Blog to Learn about New Themes, Features and Other News.
This optional selection gives WordPress permission to send you e-mail updates (to the e-mail address you typed in Step 7) with news and updates about the WordPress service.
9. Select your preferred language.
WordPr...