- 112 pages
- English
- ePUB (mobile friendly)
- Available on iOS & Android
eBook - ePub
Pen & Ink Techniques
About this book
This reader-friendly guide allows artists and would-be artists at all levels of achievement to experience the satisfaction of drawing with pen and ink techniques. Richly illustrated and containing dozens of simple exercises, it covers everything from the basic tools and materials to the production of advanced effects.
A seasoned instructor, author Frank Lohan presents dozens of exercises for beginning, intermediate, and advanced artists. His topics range from the creation of hatching, tones, and stippling to dealing with the problems that can arise when adding texture, light, and shade. An extensive reference section features examples of landscapes, trees and foliage, flowers, faces, animals, and a wealth of other subjects. Helpful suggestions include tips for copying, reducing, and enlarging sketches; instructions for easy matting; and guidelines for reproducing sketches on greeting cards and notepaper.
A seasoned instructor, author Frank Lohan presents dozens of exercises for beginning, intermediate, and advanced artists. His topics range from the creation of hatching, tones, and stippling to dealing with the problems that can arise when adding texture, light, and shade. An extensive reference section features examples of landscapes, trees and foliage, flowers, faces, animals, and a wealth of other subjects. Helpful suggestions include tips for copying, reducing, and enlarging sketches; instructions for easy matting; and guidelines for reproducing sketches on greeting cards and notepaper.
Tools to learn more effectively

Saving Books

Keyword Search

Annotating Text

Listen to it instead
Information
Part I: Basics
Some knowledge of the tools and materials used in pen and ink work is essential. Frequently at the start of a session of my classes some students show up all set to work in ink, but they have a commercial pad of paper that was made for charcoal sketching. Or, worse yet, they have a pad of newsprint. These papers were manufactured for other purposes than ink. They therefore create some problems the beginner can well do without.
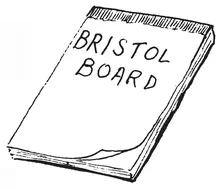
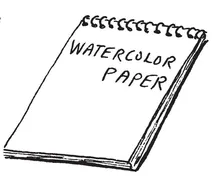
This section starts with a discussion of some of the kinds of paper that are suitable for pen and ink work. The usual smooth, hard-surfaced bristol board remains perhaps the most widely used paper for this kind of work. It is not, however, the only paper quite suited for ink. A rough watercolor paper, with the broken-line effect that it frequently causes, can bring an interesting softness to an ink sketch. Read the suggestions, but also experiment for yourself.
Pens, as noted in this section, come in many styles. The simplest is the nib pen; the most expensive are the technical pens. Most artist supply stores carry several makes of each kind of pen and will gladly show you the features offered by each make. How much you spend for a pen will be determined by how serious you are about sketching. If you really intend to get into it, then the more expensive artist’s fountain pen with a couple of points will last a lifetime——and will free you from carrying around ink bottles.
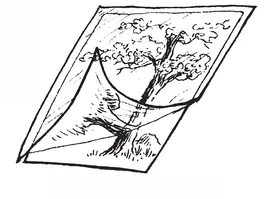
The easiest way to copy, enlarge, or reduce a sketch or a picture that you want to sketch is with the grid system shown in this section. For those whose drawing skills are not well-developed, this scheme is essential to avoid gross errors in perspective. If you do not want to put lines directly on the subject picture, you can create a grid on tracing paper and lay it over your subject Then put the working grid on your sketch paper, and you are ready to go.
It is recommended that you take to heart the comments about minimizing outlines. This will be the biggest single step you can initially take to make your sketches look really professional and to get away from that coloring-book appearance in your work.
Paper
Paper is no problem for pen and ink work. For practice, almost any good typing paper will do. For final sketches, however, a heavier paper is better.
One of the best papers is bristol board. This comes in several weights—two-ply, three-ply, and up. It is a hard-surfaced paper and takes ink very well. It comes in pads of various sizes—9 x 12, 11 x 14, and so on.
Watercolor paper is also interesting because of its texture. This texture can lend real interest to a pen sketch. Some watercolor papers such as Morilla board come in an off-white or beige color that looks quite good with a dark brown ink.
Watercolor papers come in different weights—80 pound, 140 pound, etc. They are available in pads of various sizes, also.
Sketches can also be done on clear acetate film. Make your pencil composition and lay a piece of acetate over it. Use drawing ink that says “for film” on the box for best results.
You can make a simple watercolor underlay for an acetate sketch. The sketch has all the detail line work, and the simple swatches of color under it can give you a really bright, snappy result. The color should be on a separate sheet of paper under the acetate film.
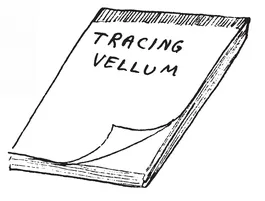
Tracing vellum is useful to place over your sketch to try different ways of creating a difficult texture. You can try several ways of doing it before you commit yourself to putting ink on your final drawing.
Vellum looks white but is nearly transparent when placed over a pencil drawing. You can also make a watercolor underlay for a vellum sketch, just as with the acetate film, for a different effect.
Any surface that takes ink well can be used for sketching. Colored papers or mat board also give interesting effects.
Scratchboard, a special paper, is discussed and demonstrated later in this book.
Pens
There are several types of pens for sketching. At the right the standard nib pen is shown. This is the least expensive, the holder costing about 25 cents and each point about 20 cents. There are many different points available in varying degrees of flexibility.
The best to start with is the Crowquill point.
The nib-type pen can be used with any kind of india ink, but it must be kept clean by frequent wiping while you are using it.
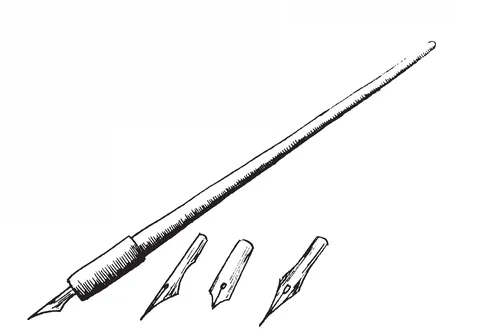
The technical pen, often called the Rapidograph type, is shown at the right. This is a tubular point pen; it has no flexibility, and each point makes just one line width. The 000 or 3×0 is good to start with.
The big advantage of this type is that it is a fountain pen and eliminates both carrying ink and constant dipping.
Many different points are available for different line widths.
NEVER use ordinary india ink in these pens. Special ink is required.
There are several makes of technical pen...
Table of contents
- Title Page
- Bibliographical Note
- Copyright Page
- Dedication
- Table of Contents
- Introduction
- Part I: Basics
- Part II: Beginning
- Part III: Intermediate
- Part IV: Reference
- Bibliography
Frequently asked questions
Yes, you can cancel anytime from the Subscription tab in your account settings on the Perlego website. Your subscription will stay active until the end of your current billing period. Learn how to cancel your subscription
No, books cannot be downloaded as external files, such as PDFs, for use outside of Perlego. However, you can download books within the Perlego app for offline reading on mobile or tablet. Learn how to download books offline
Perlego offers two plans: Essential and Complete
- Essential is ideal for learners and professionals who enjoy exploring a wide range of subjects. Access the Essential Library with 800,000+ trusted titles and best-sellers across business, personal growth, and the humanities. Includes unlimited reading time and Standard Read Aloud voice.
- Complete: Perfect for advanced learners and researchers needing full, unrestricted access. Unlock 1.4M+ books across hundreds of subjects, including academic and specialized titles. The Complete Plan also includes advanced features like Premium Read Aloud and Research Assistant.
We are an online textbook subscription service, where you can get access to an entire online library for less than the price of a single book per month. With over 1 million books across 990+ topics, we’ve got you covered! Learn about our mission
Look out for the read-aloud symbol on your next book to see if you can listen to it. The read-aloud tool reads text aloud for you, highlighting the text as it is being read. You can pause it, speed it up and slow it down. Learn more about Read Aloud
Yes! You can use the Perlego app on both iOS and Android devices to read anytime, anywhere — even offline. Perfect for commutes or when you’re on the go.
Please note we cannot support devices running on iOS 13 and Android 7 or earlier. Learn more about using the app
Please note we cannot support devices running on iOS 13 and Android 7 or earlier. Learn more about using the app
Yes, you can access Pen & Ink Techniques by Frank J. Lohan in PDF and/or ePUB format, as well as other popular books in Art & Art Techniques. We have over one million books available in our catalogue for you to explore.