- 273 pages
- English
- ePUB (mobile friendly)
- Available on iOS & Android
About this book
Digital Forensic Art Techniques: A Professional's Guide to Corel PainterTM illustrates hands-on techniques to digitally create forensic art for police and investigative purposes. Coverage focuses specifically on how to utilize the software to create realistic human likenesses, including composites of suspects and drawings of persons in unidentified remains cases.
Drawing digitally is like using any tool in art: a pencil, a charcoal stick, a conte' crayon. A stylus is just another tool to master. Digital work is easier for artists to send to the case detective, and the work always reproduces exactly as it was completed. Another benefit to working digitally is that one can use video conferencing with a witness online to provide services remotely world-wide. This enables police departments who have never had access to a forensic artist to have a sketch done within hours of the crime.
Chapters address the more basic functions to serve as a primer for those transitioning to working digitally. There is also instruction on light and shadow, and bones and muscles of the skull. All of the discussion is intended to make the reader see things as an artist to improve drawing skills and overall digital techniques.
In short, Digital Forensic Art Techniques is a practical, easy-to-follow manual for working forensic artists that will give readers a solid base from which to start. It serves as an essential resource to greater skill and comfort with the hardware and software, thus furthering current best practices and technological advances in the field.
Tools to learn more effectively

Saving Books

Keyword Search

Annotating Text

Listen to it instead
Information
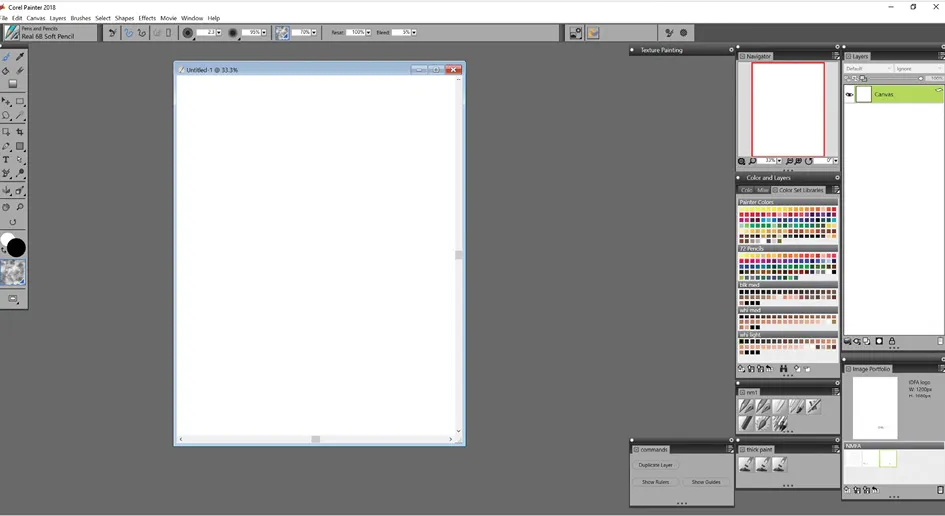


Table of contents
- Cover
- Half Title
- Title Page
- Copyright Page
- Contents
- Preface
- Acknowledgments
- Author
- Introduction
- Chapter 1: The Workspace
- Chapter 2: Setting Up Your Workspace for a Composite
- Chapter 3: Composite Drawing
- Chapter 4: Step-by-Step Composite Case 1
- Chapter 5: Step-by-Step Composite Case 2
- Chapter 6: Filing System, Case Log, and Court
- Chapter 7: Skull and Muscle Anatomy
- Chapter 8: Light on the Face
- Chapter 9: Adding Tone
- Chapter 10: Adding Photographic Elements to a Composite
- Chapter 11: Postmortem Drawing
- Chapter 12: 2-D Reconstruction
- Chapter 13: Customizing Painter
- Chapter 14: Conclusion
- Index
Frequently asked questions
- Essential is ideal for learners and professionals who enjoy exploring a wide range of subjects. Access the Essential Library with 800,000+ trusted titles and best-sellers across business, personal growth, and the humanities. Includes unlimited reading time and Standard Read Aloud voice.
- Complete: Perfect for advanced learners and researchers needing full, unrestricted access. Unlock 1.4M+ books across hundreds of subjects, including academic and specialized titles. The Complete Plan also includes advanced features like Premium Read Aloud and Research Assistant.
Please note we cannot support devices running on iOS 13 and Android 7 or earlier. Learn more about using the app