- 428 pages
- English
- ePUB (mobile friendly)
- Available on iOS & Android
Introduction to AutoCAD 2009
About this book
Alf Yarwood provides a practical, structured course of work matched to the latest release of AutoCAD. After introducing first principles and the creation of 2D technical drawings, he goes on to demonstrate the construction of 3D solid and surface model drawings and rendering. All the new features of the 2009 software release are taken into account and the increasing emphasis on 3D solid modelling in the software is reflected in the book. The 2D chapters are also suitable for those learning how to use AutoCAD LT 2009.
Suitable for all new users of AutoCAD, this book is particularly applicable to vocational and introductory level undergraduate courses in engineering and construction. It is an ideal textbook for the City & Guilds Computer Aided Design and Engineering qualifications (4353 and 2303)and the relevant CAD units of BTEC National and BTEC Higher National Engineering and Construction schemes from Edexcel.
A free companion website is available at http://books.elsevier.com/companions/9780750689830 and features:
- Worked solutions and AutoCAD drawing files of stages and results for the exercises in the book
- Further exercises and multiple-choice questions with answers.
Tools to learn more effectively

Saving Books

Keyword Search

Annotating Text

Listen to it instead
Information
Part 1
2D Design
Chapter 1
Introducing AutoCAD 2009
AIM OF THIS CHAPTER
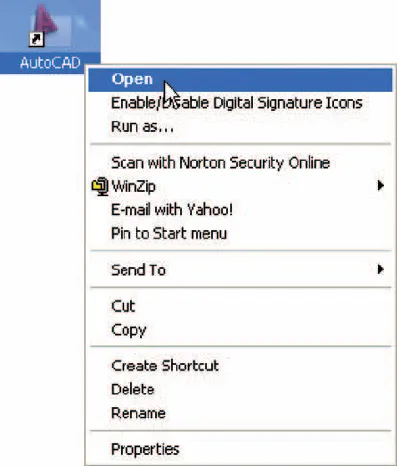
Opening AutoCAD 2009

- Ribbon: which includes tabs, each of which when clicked will bring a set of panels containing tool icons. Further tool panels can be seen by clicking the appropriate tab.
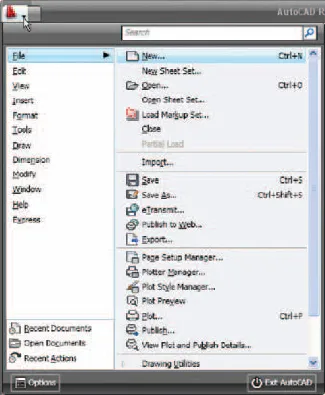
- Menu Browser icon: A left-click on the arrow to the right of the A symbol at the top-left-hand corner of the AutoCAD 2009 window causes the Menu Browser menu to appear (Fig. 1.4).

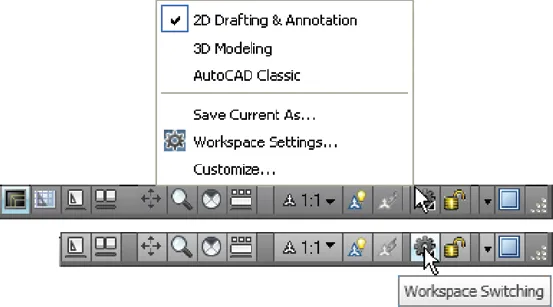
- Workspaces Switching menu: appears with a click on the Workshop Switching button in the status bar (Fig. 1.5).
- Command palette: can be dragged from its position at the bottom of the AutoCAD window into the AutoCAD drawing area, when it can be seen to be a palette (Fig. 1.6). As with all palettes, an Auto-hide icon and a right-click menu is included:
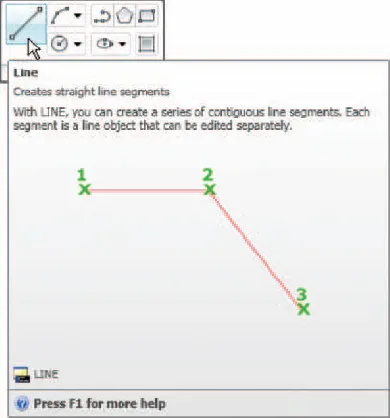
- Panels: each shows tools appropriate to the panel. Taking the Home/Draw panel as an example, Fig. 1.7 shows that a click on one of the tool icons in the panel brings a tooltip on screen showing details of how the tool can be used. Other tool icons have a pop-up menu as a tooltip. In the example given in Fig. 1.8, a click on the Circle tool icon will show a tooltip. A click on the arrow to the right of the tool icon and a flyout appears showing the construction method options available for the tool.

- Standard ...
Table of contents
- Cover
- Half Title
- Title Page
- Copyright
- Contents
- Preface
- Part 1: 2D Design
- Part 2: 3D Design
- Part 3: Internet tools and Design
- Part 4: Appendices
- Index
Frequently asked questions
- Essential is ideal for learners and professionals who enjoy exploring a wide range of subjects. Access the Essential Library with 800,000+ trusted titles and best-sellers across business, personal growth, and the humanities. Includes unlimited reading time and Standard Read Aloud voice.
- Complete: Perfect for advanced learners and researchers needing full, unrestricted access. Unlock 1.4M+ books across hundreds of subjects, including academic and specialized titles. The Complete Plan also includes advanced features like Premium Read Aloud and Research Assistant.
Please note we cannot support devices running on iOS 13 and Android 7 or earlier. Learn more about using the app