For all of your video and audio blogging business and professional communication needs, this book is it!
The Hands-on Guide to Video Blogging and Podcasting provides tremendous value to those content publishers, big and small, that want to create syndicated video blog and podcast content. The simplified, plain talking break-down the authors bring to the book will give everyone the tools to plan, create, and execute a blog/podcast outlet.
This book explains these emerging media tools from a professional perspective. Quickly learn the technical aspects of video blogging and podcasting along with their business and financial ramifications.
eBook - ePub
Hands-On Guide to Video Blogging and Podcasting
Emerging Media Tools for Business Communication
- 360 pages
- English
- ePUB (mobile friendly)
- Available on iOS & Android
eBook - ePub
Hands-On Guide to Video Blogging and Podcasting
Emerging Media Tools for Business Communication
About this book
Trusted by 375,005 students
Access to over 1.5 million titles for a fair monthly price.
Study more efficiently using our study tools.
Information
Subtopic
Digital MarketingIndex
BusinessCHAPTER 1
Quick Start
In this chapter we’re going to upload a video blog or a podcast, your call. The steps to do it are quite straightforward, and if you have any experience with posting web pages or blog entries, or serving MP3s from a website, you know enough to quickly get a podcast up.
All video blogs or podcasts are, in reality, blogs with links to multimedia. If you create a blog and link it to video, then you have technically created a “video blog.” However, to make such a blog into a compatible multimedia feed that can be subscribed to and automatically downloaded by programs such as iTunes, you’re going to need to learn a few more details.
This chapter will briefly cover the steps of creating your first podcast, including:
1. Recording audio or video
2. Editing
3. Converting and compressing
4. Uploading to a web page
5. Creating a blog
6. Adding an enclosure to your RSS feed
7. Subscribing to your podcast
Podcasting and video blogging in its current state is divided into a few specific tasks, all of which are required for them to work properly. Even as more flexible tools are developed to combine these tasks, there will always be a manual way to create and post content.
While the term podcast initially implied only audio content, that may change over time now that iPods can handle video as well. Video blogging, as a term, is very specific. We’re going to use the royal sense of podcasting to include both audio and video blog posting. In this chapter, we’ll focus on a simple video blog posting; however, the steps are virtually identical for an audio blog.
Record Some Video
The first part of making a podcast is simply to record something to attach to your blog. To do this, you’re going to need to get audio or video recorded and imported into the computer. A digital video (DV) camera works well with computers. Its strength is in its native digital recording and remote control capabilities when plugged into a computer’s FireWire® port. If you’re wondering which DV cam to buy, it’s important to keep its purpose, quality, features and costs in mind. If you’ll be capturing video where there is not too much motion and plenty of light, a low-end JVC or Samsung should do the trick for about $300 (see Figure 1-1).
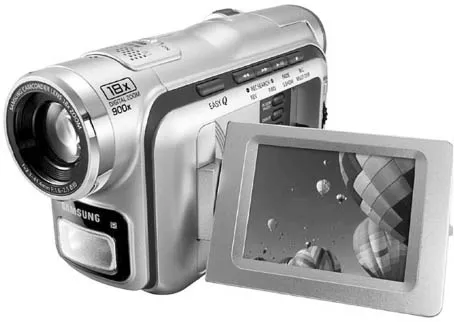
Figure 1-1
Samsung SC-D103 DV camera
The more expensive cameras get you higher quality, many more manual settings like white balance and three CCD chips that separates recording into RGB signals. The split of red, green and blue offer a much higher quality master recording. Features may include the ability to edit on the camera, make use of transparency functions such as a Greenscreen, and more advanced remote options.
Whichever one you choose, make sure it has a FireWire port (also called iLink® or IEEE1394). With that port, your software editing program can control the tape system, allowing you better DV-to-hard drive transfers. Having that control over the DV cam, it can go through editing software such as Sony’s Vegas product, which offers far more flexibility in what video you pull from the tape, saving space and making the editing process simpler. That’s not to say you can’t use other types of video cameras. If you already have a High8, VHS-C or SVHS camera floating around, it can be used with good results. The picture quality will not be as high as a DV cam, but you’ll be able to get a decent picture to work with.
The non-DV cams necessitate using a video capture device. There are so many to choose from, that the sheer number of them can cause confusion for the buyers. There are a few things to keep in mind when trying to decide on a capture device and the first is budget. Fortunately, there are many boards available in the $100 range that will provide a high level of capture quality.
USB-based devices, while easy to use, still have some bugs that prevent optimal video transfer. For the purpose of video blogging, the Dazzle devices from Pinnacle (http://www.pinaclesys.com) may do the job but you run the risk of over-dedicating your USB chain. This issue comes from the ability of USB devices to stay fully engaged to their task without dropping important data. In the case of a USB video capture device, the failure can result in dropped frames. Many USB devices are happy to sit and wait a few milliseconds to get their data through; video on the other hand is very needy and when the chain is too busy, it shows up in the dub.
The best route for capturing non-DVs is with the good old-fashioned add-on card. There are two varieties of capture cards. ATI’s All-In-Wonder cards are everything cards. They are graphics engines, TV tuners, video output cards, input cards and come with a massive suite of software tools. ATI has been at it for a long time and their cards are well supported, but you may end up paying for features you don’t care for and the cards usually prefer to be the primary graphics device. If you’re interested in a full multimedia upgrade, this might work for you. The second type of card is the audio/video capture board. It’s a dedicated video and audio input device. It does not have any outputs and lives only to ingest audio and video. Some of the boards are video only and can help reduce any confusion and redundancy with other on-board audio devices or prosumer audio capture boards. These boards are often geared specifically for processing audio and video and nothing else. That nonsharing attitude allows the board to focus on the one task, high-resolution ingest and no dropped frames.
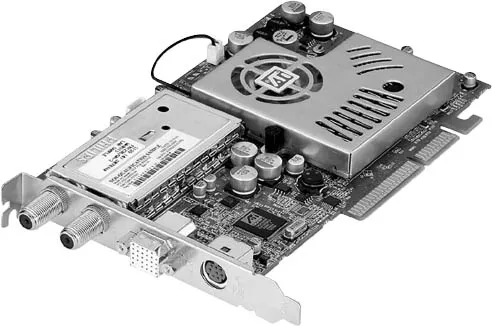
Figure 1-2
ATI All-In-Wonder
Dedicated capture cards are a rare breed and can be more difficult to find. Most big box retailers have slim offerings in the video capture area, and what they do carry will be USB connected devices don’t offer up the best transfers. What’s more, these devices often cost about the same as a high quality PCI capture card that can handle as much as four times the data throughput. The Winnov card (http://www.winnov.com) is one of those video capture card manufacturers that is not expensive, provides high quality products that do exactly what you need them to do. Their Videum 1000 VO (VO means Video Only) has a street price of about $150 and supports a 640 × 480 capture at 30 frames per second, uncompressed (see Figure 1-4). It works with all major editing packages such as Windows Movie Maker, Adobe Premiere and Vegas Video. Spending the little bit of extra money on a part you don’t have to worry about can reduce any unnecessary suffering at the hands of a fickle video capture. KWorld and Turtle Beach also manufacture quality video capture boards that offer high quality video transfers. On the professional side of analog video capture cards, however, the Osprey is the best and most supported champion. If your encoding and streaming software supports any cards, it will support an Osprey. These cards range from the $150 range to many hundreds of dollars depending on how many different audio and video inputs they have, but they are the industry standard.
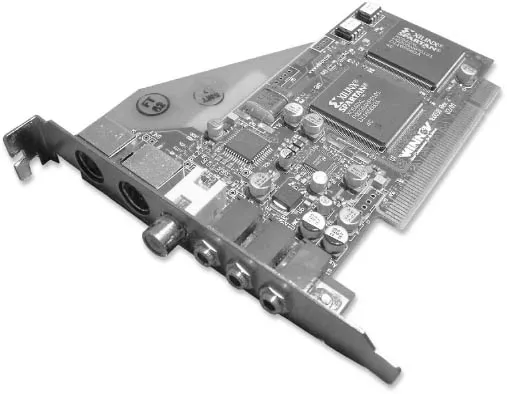
Figure 1-3
Winnov Videum 1000 VO video capture card
A webcam can be used for video recording and capturing in as much as any low-end video device for the task. It will take video and make a file out of it. The quality of that file will only be as good as the camera, and most webcams simply don’t have the frame rate to offer decent video. Webcams are best suited for chatting applications where low frame rate is tolerated. Even the higher-end webcams just don’t offer what an old High8 or inexpensive DV cam does. That being said, it will work, just not well and not like something you would want to show other people. If the video is supposed to look like an informal webcam, then there is no problem, but you’ll still probably want to record the audio using a lavalier (clip-on) microphone or other setup to ensure the resulting production looks faux-amateur and not, well, amateur.
Edit Your Video
Once the video has been transferred to your computer, it’s time to edit it, if only to snip off the ragged ends. Most video editing packages offer a try before you buy setup with various limitations, be it time or the ability to render a final product. Before settling on any one product, try a few out. Some may be more feature-rich than you need, some may not have the interface that works for you, and others may be too expensive. The first one to try is the one that comes with your computer. While often a bare-bones approach, it might just render what you need it to.
If not, there are professional editing programs, which includes some that are not cheap. Vegas Video Pro 6 (Figure 1-4) runs about $500, and Adobe Premiere weighs in at close to $700, but fortunately, there is a happy middle ground. Sony Media Software has a pared-down editor called Vegas Movie Studio + DVD for only $90. Adobe also has the $100 Premiere Elements, which gives you the power to edit video without breaking the bank. I mention the more expensive programs first because of their professional pedigrees. The less expensive programs are chips off the big ticket block that look and feel more like expensive editing programs. Your local big-box retailer may have an extensive collection of video editing applications, but you run the risk of buying a GUI wizard type editor that ends up being Mac users are familiar with the Adobe applications, but they also have access to a few other very powerful video editing tools: iMovie and Final Cut Pro. As with the PC editing options, there is a Pro (expensive) version and the lighter one (far less expensive) and your needs will dictate which one to buy, although in this case iMovie is free so starting there makes sense.
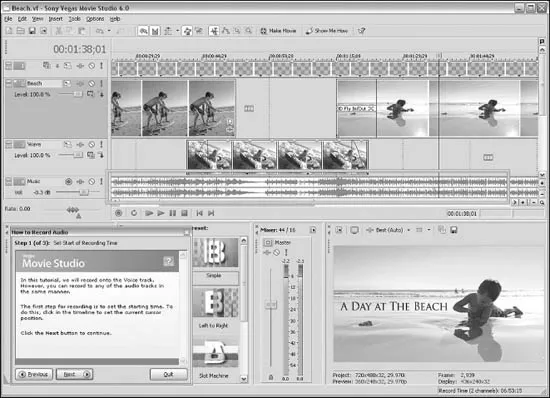
Figure 1-4
Sony Media Software—Vegas Movie Studio 6 video editing application
The best video clips to test in your prospective editing program will be the video you just shot and captured. Snip out the ragged ends, add in a few stills, even go in and smooth out some “ums” and “uhs” fr...
Table of contents
- Cover
- Halftitle
- Title
- Copyright
- Dedication
- Table of Contents
- Acknowledgments
- About the Authors
- Introduction
- Chapter 1: Quick Start
- Chapter 2: Podcasting and Video Blogging Basics
- Chapter 3: Podcasting and Video Blogging Uses
- Chapter 4: Tuning In to Multimedia Blogs
- Chapter 5: Monetizing New Content Delivery Models
- Chapter 6: New Skills for a New Technology
- Chapter 7: Mobile Video Blogging and Podcasting
- Chapter 8: In the Studio and On-the-Go
- Chapter 9: Essential Tools
- Chapter 10: Audio Production and Post-Production
- Chapter 11: Video Production and Post-Production
- Chapter 12: Hosting and Bandwidth
- Chapter 13: Assembling Blog Entries
- Chapter 14: Licensing and Copyrights
- Chapter 15: Case Studies
- Appendix: Administration
- Glossary
- Index
Frequently asked questions
Yes, you can cancel anytime from the Subscription tab in your account settings on the Perlego website. Your subscription will stay active until the end of your current billing period. Learn how to cancel your subscription
No, books cannot be downloaded as external files, such as PDFs, for use outside of Perlego. However, you can download books within the Perlego app for offline reading on mobile or tablet. Learn how to download books offline
Perlego offers two plans: Essential and Complete
- Essential is ideal for learners and professionals who enjoy exploring a wide range of subjects. Access the Essential Library with 800,000+ trusted titles and best-sellers across business, personal growth, and the humanities. Includes unlimited reading time and Standard Read Aloud voice.
- Complete: Perfect for advanced learners and researchers needing full, unrestricted access. Unlock 1.5M+ books across hundreds of subjects, including academic and specialized titles. The Complete Plan also includes advanced features like Premium Read Aloud and Research Assistant.
We are an online textbook subscription service, where you can get access to an entire online library for less than the price of a single book per month. With over 1.5 million books across 990+ topics, we’ve got you covered! Learn about our mission
Look out for the read-aloud symbol on your next book to see if you can listen to it. The read-aloud tool reads text aloud for you, highlighting the text as it is being read. You can pause it, speed it up and slow it down. Learn more about Read Aloud
Yes! You can use the Perlego app on both iOS and Android devices to read anytime, anywhere — even offline. Perfect for commutes or when you’re on the go.
Please note we cannot support devices running on iOS 13 and Android 7 or earlier. Learn more about using the app
Please note we cannot support devices running on iOS 13 and Android 7 or earlier. Learn more about using the app
Yes, you can access Hands-On Guide to Video Blogging and Podcasting by Lionel Felix,Damien Stolarz in PDF and/or ePUB format, as well as other popular books in Business & Digital Marketing. We have over 1.5 million books available in our catalogue for you to explore.