eBook - ePub
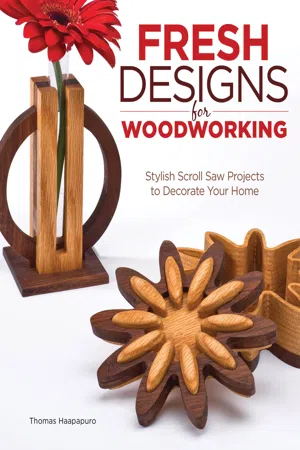
Fresh Designs for Woodworking
Stylish Scroll Saw Projects to Decorate Your Home
- 250 pages
- English
- ePUB (mobile friendly)
- Available on iOS & Android
eBook - ePub
About this book
Awaken your modern design aesthetic with 21 striking contemporary designs for thehome. The fusion of nature's elegant shapes and modern architecture's bold symmetry yeilds a dynamic and engaging collection of designs for scroll saw woodworking.
Trusted by 375,005 students
Access to over 1.5 million titles for a fair monthly price.
Study more efficiently using our study tools.
Information
1 BEGINNER PROJECTS & TECHNIQUES
This chapter is designed to teach the beginner the basics of working with the scroll saw. Here, you will be introduced to the techniques of straight cutting, stack cutting, glass cutting, and cutting interior corners. These techniques will enable you to complete the projects in this chapter, and, as you progress, you will be able to apply what you learn now to projects later in the book. Remember that you can always adapt these projects by adding elements from other patterns in the book or other patterns that you create.
WALL ART
Learning to make basic straight cuts is the beginning for most scroll saw artisans. This fundamental skill can be used to create a great variety of projects and is the underlying technique for most of the fretwork-style patterns that are popular with scroll saw users. The following three wall art projects illustrate the important steps and methods used to create the basic fretwork-style scroll saw art. In addition to making straight cuts, you will learn how to cut interior corners. The last project will also give a brief introduction to stack cutting, which can be used not only to create identical copies of a workpiece but also to ensure the edges of three-dimensional workpieces align exactly.

Radial Symmetry Trivet
This is a perfect project to begin learning how to use the scroll saw, as it has a simple materials list, primarily uses basic straight cuts, and does not require additional woodshop tools. For your first try at this pattern, make a practice piece using inexpensive pine boards before moving on to the more durable red oak I used in this project. I designed this project as a sturdy kitchen trivet, but it can also be adapted as wall art, in which case, you can make it out of thinner wood that is easier to cut.
Although this is a beginner project, it is a little more difficult than some because it uses a thicker wood stock. The thicker wood, however, may actually be a benefit for beginners since it will take a little longer for the blade to cut away the waste material. Thin wood cuts very quickly, and the cuts can get off track fast. If cutting the thicker wood is intimidating, make the project from thinner wood. The thicker wood is recommended, though, if you intend to use the project as a trivet.
Some helpful notes
This project has a number of tight inside curves that can be easily be cut with a scroll saw, provided you use the correct blade, a simple technique, and practice a bit before you cut your project.
Even though this project requires thick wood, I would not recommend using the thick wood blades available. These blades, while fast, are difficult to control and cannot make tight inside turns. Instead, use a standard-tooth or skip-tooth blade. These are normally thinner blades and can turn curves right in place. The skip-tooth blade will aid with sawdust removal from the kerf, keeping the blade cooler.
With the correct blade, a simple technique will allow you to make tight inside turns. When cutting toward an inside turn, cut right up to the intersection and come to a stop without any forward pressure on the wood. Let the saw make a few strokes without moving the wood at all. This will create a small area in which the blade can turn. Now, gently pull the board toward you and slowly turn the workpiece. The trick to this turn is recognizing there are no cutting teeth on the back edge of the blade. By gently pulling the workpiece toward you, you are pulling the blade teeth away from the wood, with only the back edge (the toothless edge) of the blade contacting the wood. When you have completed your turn, gently push forward to resume your cut. This turning technique will work for nearly any tight inside corner. The only time this trick does not work is when cutting with a very wide blade like those designed for thick wood.
DESIGN INSPIRATION
The idea for this form comes from the African violet plant, which grows low to the ground with its leaves circling around the central stem. I adapted this growth pattern into a design pattern using a leaf form copied from a cherry leaf, which has very distinct veins perfect for scroll saw work. As I developed the pattern, I had to work with all the leaf stems connecting in the center of the design. At first I left the stems in place, but the final result looked too much like a snowflake. To eliminate this effect, I inserted a simple flower in the center.
TOOLS & MATERIALS
• Two 5 ½" x 11" x ¾" (140 x 279 x 19mm) red oak boards
• Wood glue
• Clamps
• Sandpaper: P100–P150, P220
• Spray adhesive
• Drafting triangle
• Drill and small bit
• Scrap wood
• Sharpened putty knife
• Finish of choice


Enlarge pattern 150% for actual size.

Please note that to produce clear photos of the processes used in these projects, some essential safety equipment was removed from the author’s tools. This is especially true of photos that include a table saw. Please utilize all necessary safety equipment when working on these projects.
TIP: When using spray adhesive, spray the pattern, not the workpiece. The pores in the wood will absorb the adhesive, making it more difficult to remove the pattern at the end of the project.
1: GLUE THE BOARDS TOGETHER. Glue the long edges of the two red oak boards together using standard wood glue, such as Titebond II or any equiva...
Table of contents
- Cover
- Title
- About the Author
- Contents
- Introduction
- Getting Started
- Chapter 1: Beginner Projects & Techniques
- Chapter 2: Intermediate Projects & Techniques
- Chapter 3: Advanced Projects & Techniques
- Index
- Copyright
Frequently asked questions
Yes, you can cancel anytime from the Subscription tab in your account settings on the Perlego website. Your subscription will stay active until the end of your current billing period. Learn how to cancel your subscription
No, books cannot be downloaded as external files, such as PDFs, for use outside of Perlego. However, you can download books within the Perlego app for offline reading on mobile or tablet. Learn how to download books offline
Perlego offers two plans: Essential and Complete
- Essential is ideal for learners and professionals who enjoy exploring a wide range of subjects. Access the Essential Library with 800,000+ trusted titles and best-sellers across business, personal growth, and the humanities. Includes unlimited reading time and Standard Read Aloud voice.
- Complete: Perfect for advanced learners and researchers needing full, unrestricted access. Unlock 1.5M+ books across hundreds of subjects, including academic and specialized titles. The Complete Plan also includes advanced features like Premium Read Aloud and Research Assistant.
We are an online textbook subscription service, where you can get access to an entire online library for less than the price of a single book per month. With over 1.5 million books across 990+ topics, we’ve got you covered! Learn about our mission
Look out for the read-aloud symbol on your next book to see if you can listen to it. The read-aloud tool reads text aloud for you, highlighting the text as it is being read. You can pause it, speed it up and slow it down. Learn more about Read Aloud
Yes! You can use the Perlego app on both iOS and Android devices to read anytime, anywhere — even offline. Perfect for commutes or when you’re on the go.
Please note we cannot support devices running on iOS 13 and Android 7 or earlier. Learn more about using the app
Please note we cannot support devices running on iOS 13 and Android 7 or earlier. Learn more about using the app
Yes, you can access Fresh Designs for Woodworking by Thomas Haapapuro in PDF and/or ePUB format, as well as other popular books in Technology & Engineering & Technical & Manufacturing Trades. We have over 1.5 million books available in our catalogue for you to explore.