Building Serverless Python Web Services with Zappa
eBook - ePub

Building Serverless Python Web Services with Zappa

Build and deploy serverless applications on AWS using Zappa

  1. 324 pages
  2. English
  3. ePUB (mobile friendly)
  4. Available on iOS & Android
eBook - ePub

Building Serverless Python Web Services with Zappa

Build and deploy serverless applications on AWS using Zappa

About this book

Master serverless architectures in Python and their implementation, with Zappa on three different frameworks.

Key Features

  • Scalable serverless Python web services using Django, Flask, and Pyramid.
  • Learn Asynchronous task execution on AWS Lambda and scheduling using Zappa.
  • Implementing Zappa in a Docker container.

Book Description

Serverless applications are becoming very popular these days, not just because they save developers the trouble of managing the servers, but also because they provide several other benefits such as cutting heavy costs and improving the overall performance of the application.

This book will help you build serverless applications in a quick and efficient way. We begin with an introduction to AWS and the API gateway, the environment for serverless development, and Zappa. We then look at building, testing, and deploying apps in AWS with three different frameworks--Flask, Django, and Pyramid. Setting up a custom domain along with SSL certificates and configuring them with Zappa is also covered. A few advanced Zappa settings are also covered along with securing Zappa with AWS VPC.

By the end of the book you will have mastered using three frameworks to build robust and cost-efficient serverless apps in Python.

What you will learn

  • Build, test, and deploy a simple web service using AWS CLI
  • Integrate Flask-based Python applications, via AWS CLI configuration
  • Design Rest APIs integrated with Zappa for Flask and Django
  • Create a project in the Pyramid framework and configure it with Zappa
  • Generate SSL Certificates using Amazon Certificate Manager
  • Configure custom domains with AWS Route 53
  • Create a Docker container similar to AWS Lambda

Who this book is for

Python Developers who are interested in learning how to develop fast and highly scalable serverless applications in Python, will find this book useful

Tools to learn more effectively

Saving Books

Saving Books

Keyword Search

Keyword Search

Annotating Text

Annotating Text

Listen to it instead

Listen to it instead

Information

Building a Flask Application with Zappa

In the last chapter, we learned about automating the deployment process using Zappa, since Zappa helps us to deploy a Python application on the AWS Serverless infrastructure. We used this to develop a Python application using some of the Python web frameworks. In this chapter, we going to develop a Flask-based application as a serverless application on AWS Lambda.
In the previous chapter, we saw how Zappa is useful for performing serverless deployments and how it makes it easy to deploy with a single command. Now, it's time to see the larger application deployed by Zappa, since it's really important to see how an application is configured and moved to AWS Lambda.
In this chapter, we'll be covering the following topics:
  • What is Flask?
  • Minimal Flask application
  • Configuring with Zappa
  • Building, testing, and deploying on AWS Lambda
  • A complete Flask Todo application

Technical requirements

Before making headway, let's understand the technical requirements and configure the development environment. This chapter does have a conceptual demonstration of an application development. Hence, there are some prerequisites:
  • Ubuntu 16.04/macOS/Windows
  • Python 3.6
  • Pipenv tool
  • Zappa
  • Flask
  • Flask Extensions
Once you have configured Python 3.6 and installed the Pipenv tool, you can create a virtual environment and install these packages. We are going to explore the installation and configuration of this in a later section. Let's move on and understand some basic concepts of Python-based frameworks and their related implementation.

What is Flask?

Flask is a well-known Python micro web framework in the Python community. It's adopted and preferable because of its extensible nature. Flask aims to keep the code simple but extensible.
By default, Flask does not include any database abstraction layer, form validation, or any other specific functionality. Instead, Flask supports extensions to add any well-defined functionality to your application. Numerous extensions are available to provide database integration, form validation, file upload handling, authentication, and more. The Flask core team reviews extensions and ensures that they won't break the future release.
Flask allows you to define the design as per your application needs. You are not bound to follow some strict rule by Flask. You can write your application code in a single file or in a modular manner. Flask supports built-in development servers and fast debuggers, unit testing, RESTful request dispatching, Jinja2 templating, and secure cookies (for client-side sessions), all of which are WSGI 1.0-compliant and Unicode-based.
That's why many in the Python community prefer to use the Flask framework as their first choice. Let's make headway and explore the Flask-based application development process with actual implemention along with a serverless approach.

Installing Flask

Flask mainly depends on two external libraries such as Werkzeug and Jinja2. Werkzeug provides a Python standard WSGI (Web Server Gateway Interface) that enables a Python application to interact with HTTP. Jinja2 is a templating engine that enables you to render an HTML template with your own customized context.
Now, let's move on and install Flask. All its dependencies will be automatically installed; you don't need to install dependencies manually.
It's recommended that you use virtualenv to install Flask, since virtualenv enables you to install Python packages in parallel for different Python projects.
If you don't have virtualenv, then you can simply install it by using the following code:
$ sudo apt-get install python-virtualenv
Once you have installed virtualenv, you need to create a new environment for your Flask project, as shown in the following screenshot:
We will be using virtualenv in the upcoming sections. Now, let's install Flask:
$ pip install flask
We are ready to have fun with Flask. We will be creating a minimal Flask application to demonstrate the Flask application workflow.

A minimal Flask application

Let's see what a minimal Flask application looks like:
from flask import Flask
app = Flask(__name__)
@app.route('/')
def index():
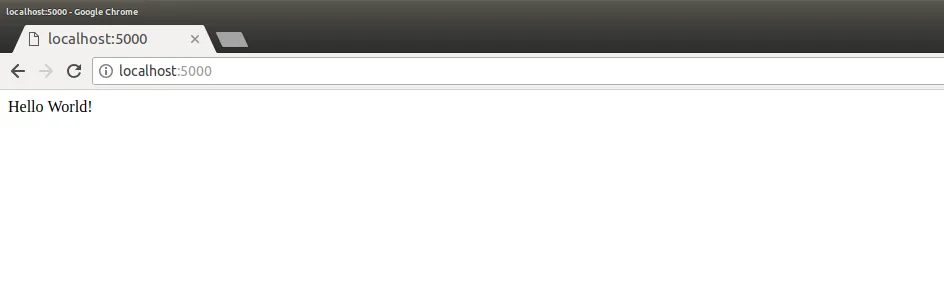
return 'Hello World!'
That's it, we are done with the minimal Flask application. It's very simple to configure and create a microservice with Flask.
Let's discuss what exactly the preceding code is doing and how we would run the program:
  1. First, we imported a Flask class.
  2. Next, we created an instance of the Flask class. This instance will be our WSGI application. This first argument will be the name of the module or package. Here, we created a single module, hence we used __name__. This is needed so that Flask knows where to look for templates, static, and other directories.
  3. Then, we used app.route as a decorator with a URL name as a parameter. This will define and map the route with the specified function.
  4. The function will be invoked to the HTTP request with the URL specified in the route decorator.
To run this program, you can either use the flask command or python -m flask, but before that, you need to set an environment variable as FLASK_APP with a module file name of where the Flask instance was defined:
$ export FLASK_APP=hello_world.py
$ flask run
* Serving Flask app "flask_todo.hello_world"
* Running on http://127.0.0.1:5000/ (Press CTRL+C to quit)
This launches a built-in server that is good enough for testing and debugging locally. The following is a screenshot of the localhost running in the browser:
Of course, it wouldn't work with production, but Flask provides numerous options for deployment. You can have a look at http://flask.pocoo.org/docs/0.12/deploying/#deployment for more information, but in our case, we are going to deploy to a serverless environment on AWS Lambda and API Gateway using Zappa.

Configuring with Zappa

In order to configure Zappa, it's required that you have Zappa installed, as mentioned in the previous chapter. Zappa provides the zappa init command, which enables a user interactive mode initialization so that we can configure the Python application.
I followed the default configuration settings that were suggested by the zappa init command. This generates the zappa_settings.json file, which is the backbone for configuring any Python application with Zappa.
Here is the content of the zappa_settings.json file:
{
"dev": {
"app_function": "hello_world.app",
"aws_region": "ap-south-1",
"profile_name": "default",
"project_name": "flask-todo",
"runtime": "python3.6",
"s3_bucket": "zappa-yrze3w53y"
}
}
Now, during initialization, Zappa has the ability to identify the type of your Python application and generate the set attributes accordingly. ...

Table of contents

  1. Title Page
  2. Copyright and Credits
  3. Dedication
  4. Packt Upsell
  5. Contributors
  6. Preface
  7. Amazon Web Services for Serverless
  8. Getting Started with Zappa
  9. Building a Flask Application with Zappa
  10. Building a Flask-Based REST API with Zappa
  11. Building a Django Application with Zappa
  12. Building a Django REST API with Zappa
  13. Building a Falcon Application with Zappa
  14. Custom Domain with SSL
  15. Asynchronous Task Execution on AWS Lambda
  16. Advanced Zappa Settings
  17. Securing Serverless Applications with Zappa
  18. Zappa with Docker
  19. Assessments
  20. Other Books You May Enjoy

Frequently asked questions

Yes, you can cancel anytime from the Subscription tab in your account settings on the Perlego website. Your subscription will stay active until the end of your current billing period. Learn how to cancel your subscription
No, books cannot be downloaded as external files, such as PDFs, for use outside of Perlego. However, you can download books within the Perlego app for offline reading on mobile or tablet. Learn how to download books offline
Perlego offers two plans: Essential and Complete
  • Essential is ideal for learners and professionals who enjoy exploring a wide range of subjects. Access the Essential Library with 800,000+ trusted titles and best-sellers across business, personal growth, and the humanities. Includes unlimited reading time and Standard Read Aloud voice.
  • Complete: Perfect for advanced learners and researchers needing full, unrestricted access. Unlock 1.4M+ books across hundreds of subjects, including academic and specialized titles. The Complete Plan also includes advanced features like Premium Read Aloud and Research Assistant.
Both plans are available with monthly, semester, or annual billing cycles.
We are an online textbook subscription service, where you can get access to an entire online library for less than the price of a single book per month. With over 1 million books across 990+ topics, we’ve got you covered! Learn about our mission
Look out for the read-aloud symbol on your next book to see if you can listen to it. The read-aloud tool reads text aloud for you, highlighting the text as it is being read. You can pause it, speed it up and slow it down. Learn more about Read Aloud
Yes! You can use the Perlego app on both iOS and Android devices to read anytime, anywhere — even offline. Perfect for commutes or when you’re on the go.
Please note we cannot support devices running on iOS 13 and Android 7 or earlier. Learn more about using the app
Yes, you can access Building Serverless Python Web Services with Zappa by Abdulwahid Abdulhaque Barguzar in PDF and/or ePUB format, as well as other popular books in Computer Science & Cloud Computing. We have over one million books available in our catalogue for you to explore.